OpenCV
前回、PythonのOpenCVを使って白黒、またはRGBのノイズを入れる方法、そして砂嵐ノイズを入れる方法を紹介しました。
前回は1ピクセルのノイズを画像に入れましたが、今回は画像に大きなノイズ(むしろ塗りつぶし)を入れる方法を紹介します。
まずは前回のおさらいからですが、画像を読み込み、1ピクセルの白色のノイズを入れる方法はこんな感じでした。
import cv2
import numpy as np
import os

default_dirpath = os.getcwd()
filename = "python-opencv16-1.jpg"

filepath = os.path.join(default_dirpath, filename)

img = cv2.imread(filepath, cv2.IMREAD_COLOR)

height, width, channel = img.shape

noise_num = 1000

rng = np.random.default_rng(0)

white_x = rng.integers(0, width-1, noise_num)
white_y = rng.integers(0, height-1, noise_num)
img[(white_y, white_x)] = (255, 255, 255)

output = os.path.join(default_dirpath, "python-opencv16-2.png")
cv2.imwrite(output, img)

実行結果
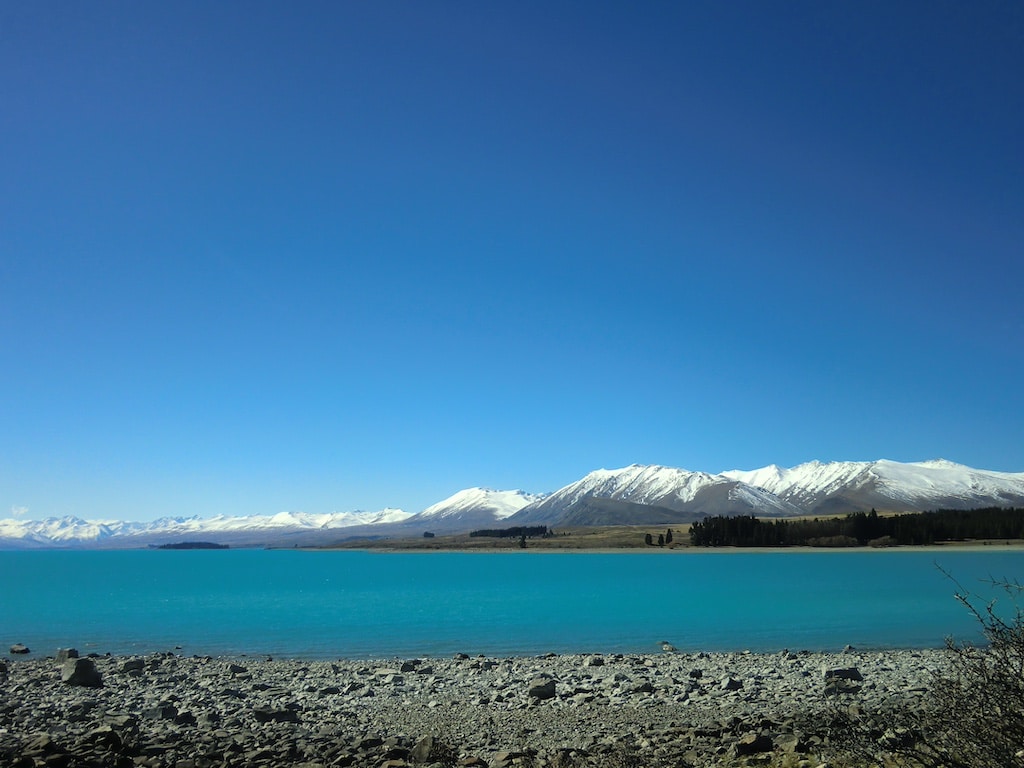
元画像(python-opencv16-1.jpg)
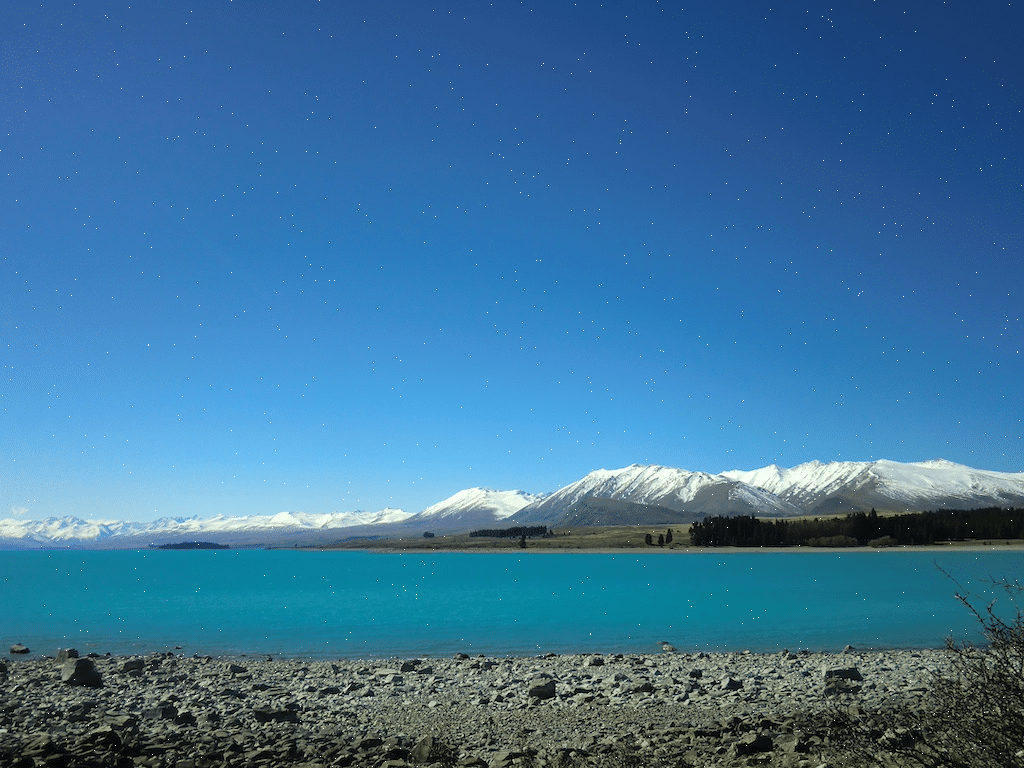
実行後画像(python-opencv16-2.jpg)
今回はこのプログラムを修正していきます。
それでは始めていきましょう。
大きなノイズを入れる方法
1ピクセルのノイズを入れる場合のノイズを入れる箇所のプログラムはこんな感じでした。
noise_num = 1000

rng = np.random.default_rng(0)

white_x = rng.integers(0, width-1, noise_num)
white_y = rng.integers(0, height-1, noise_num)
img[(white_y, white_x)] = (255, 255, 255)
ここではノイズを入れる場所のX座標とY座標をランダムに取得し、リストとして格納したのち、そのXY座標に相当するピクセルの色を白色(255, 255, 255)に変えています。
この部分を修正して複数のピクセルを一度に白色にすることで大きなノイズを追加します。
ということで作成してみたのがこちら。
around_px_size = 1
around_px = range(-around_px_size, around_px_size+1)
around_px_list = list(itertools.product(around_px, around_px))

noise_num = 100

rng = np.random.default_rng(0)

white_x = rng.integers(0, width-1, noise_num)
white_y = rng.integers(0, height-1, noise_num)

for x, y in zip(white_x, white_y):
    for around_px in around_px_list:
        y_pos = y+around_px[1]
        x_pos = x+around_px[0]
        if 0 <= y_pos < height and 0 <= x_pos < width:
            img[y_pos, x_pos] = (255, 255, 255)
考えとしては下の部分でノイズを入れる中心のピクセルを指定することから、そこから周囲に指定したピクセル分広げて大きなノイズにしようというものです。
rng = np.random.default_rng(0)

white_x = rng.integers(0, width-1, noise_num)
white_y = rng.integers(0, height-1, noise_num)
そこで最初に広げるピクセル数を「around_px_size」で指定します。
次にノイズの中心のピクセルからノイズにするピクセルの相対的な座標を作ります。
その際、まず広げるピクセル数からrange関数で連続した値のリストを作成し、その後、itertools.productを使って2次元リストとして全ての組み合わせを作成します。
around_px_size = 1
around_px = range(-around_px_size, around_px_size+1)
around_px_list = list(itertools.product(around_px, around_px))
そしてノイズの中心の座標を取得したのち、中心の座標とそこから相対的に塗りつぶす座標を使い、色を変えていきます。
for x, y in zip(white_x, white_y):
    for around_px in around_px_list:
        y_pos = y+around_px[1]
        x_pos = x+around_px[0]
        if 0 <= y_pos < height and 0 <= x_pos < width:
            img[y_pos, x_pos] = (255, 255, 255)
ここではまず中心の座標を取得したのち、その周囲の相対座標を使って色を変更するピクセルの座標を取得します。
その後、その取得した座標が画像の中に存在しているか、つまり座標「0, 0」のピクセルから、画像の高さ、幅のピクセルまでに収まっているかをif文を使って条件分岐し、中にある場合は色を変更します。
プログラム全体としてはこんな感じになります。
import cv2
import numpy as np
import os
import itertools

default_dirpath = os.getcwd()
filename = "python-opencv16-1.jpg"

filepath = os.path.join(default_dirpath, filename)

img = cv2.imread(filepath, cv2.IMREAD_COLOR)

height, width, channel = img.shape

around_px_size = 1
around_px = range(-around_px_size, around_px_size+1)
around_px_list = list(itertools.product(around_px, around_px))

noise_num = 100

rng = np.random.default_rng(0)

white_x = rng.integers(0, width-1, noise_num)
white_y = rng.integers(0, height-1, noise_num)

for x, y in zip(white_x, white_y):
    for around_px in around_px_list:
        y_pos = y+around_px[1]
        x_pos = x+around_px[0]
        if 0 <= y_pos < height and 0 <= x_pos < width:
            img[y_pos, x_pos] = (255, 255, 255)

output = os.path.join(default_dirpath, "python-opencv16-3.png")
cv2.imwrite(output, img)

実行結果
周囲のピクセル数を大きくするとさらに大きくなります。
import cv2
import numpy as np
import os
import itertools

default_dirpath = os.getcwd()
filename = "python-opencv16-1.jpg"

filepath = os.path.join(default_dirpath, filename)

img = cv2.imread(filepath, cv2.IMREAD_COLOR)

height, width, channel = img.shape

around_px_size = 10
around_px = range(-around_px_size, around_px_size+1)
around_px_list = list(itertools.product(around_px, around_px))

noise_num = 100

rng = np.random.default_rng(0)

white_x = rng.integers(0, width-1, noise_num)
white_y = rng.integers(0, height-1, noise_num)

for x, y in zip(white_x, white_y):
    for around_px in around_px_list:
        y_pos = y+around_px[1]
        x_pos = x+around_px[0]
        if 0 <= y_pos < height and 0 <= x_pos < width:
            img[y_pos, x_pos] = (255, 255, 255)

output = os.path.join(default_dirpath, "python-opencv16-4.png")
cv2.imwrite(output, img)

実行結果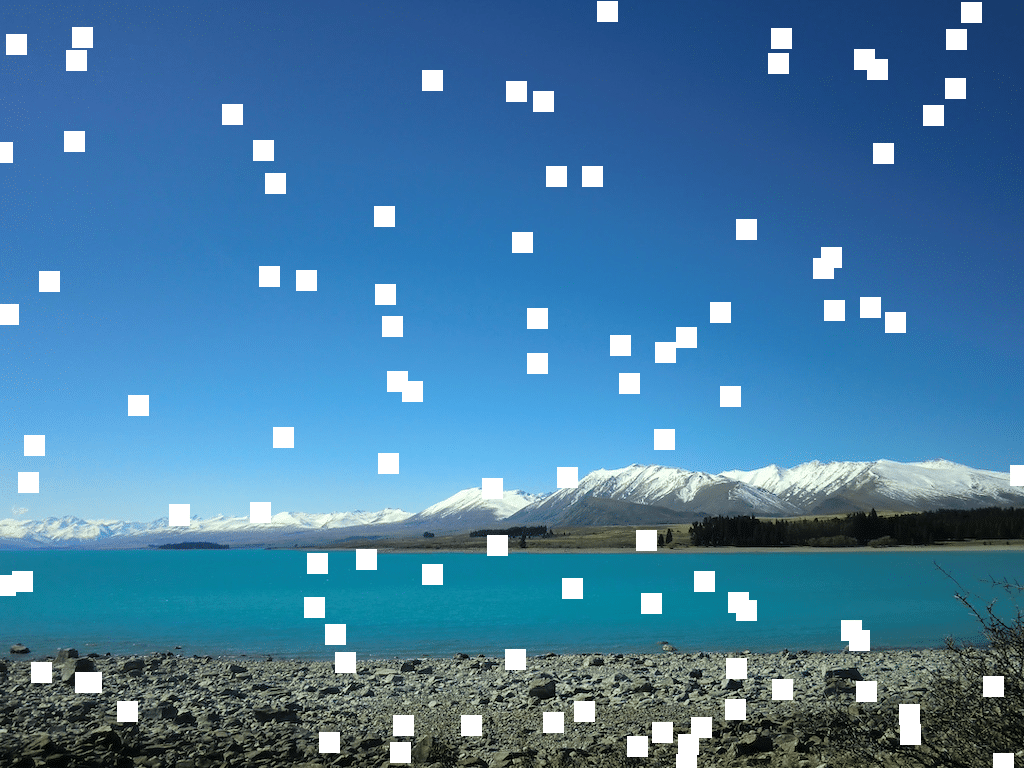
いっぱい四角が現れました。
次回はNumPyのndarrayから複数のインデックスを指定し複数の要素を一度に取得する方法を紹介します。
ではでは今回はこんな感じで。

コメント