Optically
前回、HomebrewでpyenvをインストールしてPythonプログラミング環境の構築する方法を紹介しました。
今回は光線解析ライブラリOpticalpyのインストールと光源の設定方法を紹介します。
前に同様の光線解析ライブラリraytracingを紹介しました。
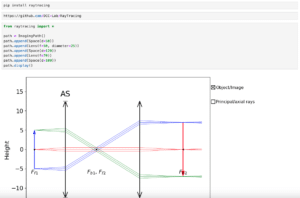
raytracingはraytracingでいいのですが、直線上しか光学部品を配置できなかったり、加えた空間や部品の範囲内しか計算ができなかったりと、使っていくうちに何となく足りない部分が見えてきました。
そこでちょっと違うライブラリは無いものかと探して、見つけたのが今回紹介する「Opticalpy」というライブラリです。
Opticalpyでは2次元的や3次元的に光学部品を配置し解析することができますし、また複数の波長を一度に解析するなんてこともできます。
また空間を指定せずとも、光源からの光線が計算されるため、光学部品に当たらなかった光線も解析することができます。
ということでちょっと試してみましたというのが今回から数回のお話です。
それでは始めていきましょう。
Opticalpyのインストール
まずはOpticalpyをインストールしていきます。
インストールはいつも通りpipを使ってインストールできます。
pip install opticalpyちなみにこのOpticalpyライブラリを解説しているサイトはほとんどなく情報ソースは作者のGithubページだけだったりします。
ということで何か困ったら上記のサイトを確認してみてください。
シーンの作成
Opticalpyで光線解析するにあたってまずすべきはシーンの作成です。
opticalpyを「op」という名前でインポートして、「scene = op.Scene()」でインスタンスを作成します。
この中に光学部品を入れていき、光学系を作成していきます。
また「scene.plot()」とすると光学系をプロットしてくれます。
import opticalpy as op

scene = op.Scene()

scene.plot()

実行結果
Sceneのインスタンスを作成する際、「xlim」と「ylim」で範囲を指定することもできます。
というよりも指定しない場合、Xの値の範囲も、Yの値の範囲も「0から1」というごく狭い範囲になりますので、ほぼ必須の引数です。
import opticalpy as op

scene = op.Scene(xlim=(-100, 100), ylim=(-50, 50))

scene.plot()

実行結果
光源の設置
次に光源を設置していきます。
光源にどんな種類があるかは「help(op.elems.beam)」で確認できます。
import opticalpy as op

print(help(op.elems.beam))

実行結果
Help on module opticalpy.elems.beam in opticalpy.elems:

NAME
    opticalpy.elems.beam

FUNCTIONS
    CollimatedBeam(
        aperture: float,
        wavelength: float | astropy.units.quantity.Quantity | list[astropy.units.quantity.Quantity | float] | numpy.ndarray = <Quantity 450. nm>,
        scene=None,
        group=None,
        origin: list[float] | numpy.ndarray = [0, 0],
        rotation: float | astropy.units.quantity.Quantity = <Quantity 0. deg>,
        N_sources: int = 20,
        hole: float = 0.0,
        label: str | None = 'Collimated'
    )

    ConvergingBeam(
        focal: float | astropy.units.quantity.Quantity,
        F: float,
        wavelength: float | astropy.units.quantity.Quantity | list[astropy.units.quantity.Quantity | float] | numpy.ndarray = <Quantity 450. nm>,
        scene=None,
        group=None,
        origin: list[float] | numpy.ndarray = [0, 0],
        rotation: float | astropy.units.quantity.Quantity = <Quantity 0. deg>,
        N_sources: int = 20,
        hole: float | astropy.units.quantity.Quantity = <Quantity 0. deg>,
        label: str | None = 'Converging'
    )

    DivergingBeam(
        angle: float | astropy.units.quantity.Quantity,
        wavelength: float | astropy.units.quantity.Quantity | list[astropy.units.quantity.Quantity | float] | numpy.ndarray = <Quantity 450. nm>,
        scene=None,
        group=None,
        origin: list[float] | numpy.ndarray = [0, 0],
        rotation: float | astropy.units.quantity.Quantity = <Quantity 0. deg>,
        N_sources: int = 20,
        hole: float | astropy.units.quantity.Quantity = <Quantity 0. deg>,
        label: str | None = 'Diverging'
    )

    WhiteRay(
        wavelengths: list[astropy.units.quantity.Quantity | float] | numpy.ndarray,
        scene=None,
        group=None,
        origin: list[float] | numpy.ndarray = [0, 0],
        rotation: float | astropy.units.quantity.Quantity = <Quantity 0. deg>,
        label: str | None = 'White'
    )
CollimatedBeam、ConvergingBeam、DivergingBeam、WhiteRayが準備されていますので、後で順に見ていきましょう。
ちなみに他の光学部品としては「op.elems」に格納されています。
import opticalpy as op

print(help(op.elems))

実行結果
Help on package opticalpy.elems in opticalpy:

NAME
    opticalpy.elems

PACKAGE CONTENTS
    beam
    filter
    grating
    lens
    material
    mirror
    telescope
今回は「beam」を紹介しますが、次回から他の光学部品に関しても紹介していきます。
CollimatedBeam
CollimatedBeamとは並行光の光源です。
最低限必要なのは「aperture」、つまりは開口サイズです。
import opticalpy as op

scene = op.Scene(xlim=(-50, 250), ylim=(-100, 100))

beam = op.elems.CollimatedBeam(aperture=10)

scene.plot()

実行結果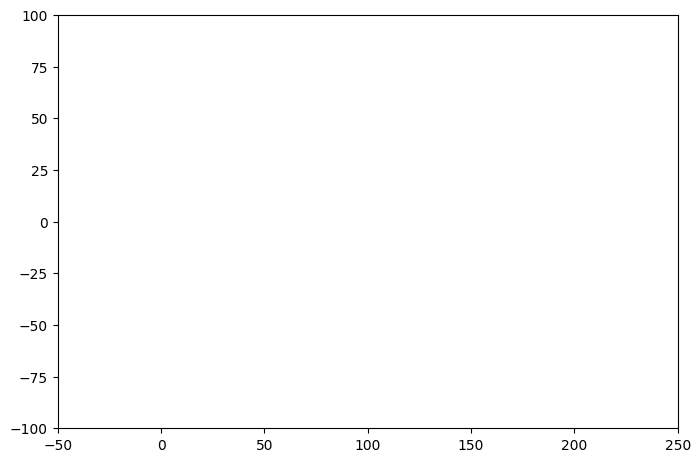
ただ実はこのままではプロットされなかったりします。
さらに必要なのが「scene = scene」という引数で、どのシーンに対して配置するか指定する必要があります。
import opticalpy as op

scene = op.Scene(xlim=(-50, 250), ylim=(-100, 100))

beam = op.elems.CollimatedBeam(aperture=10, scene=scene)

scene.plot()

実行結果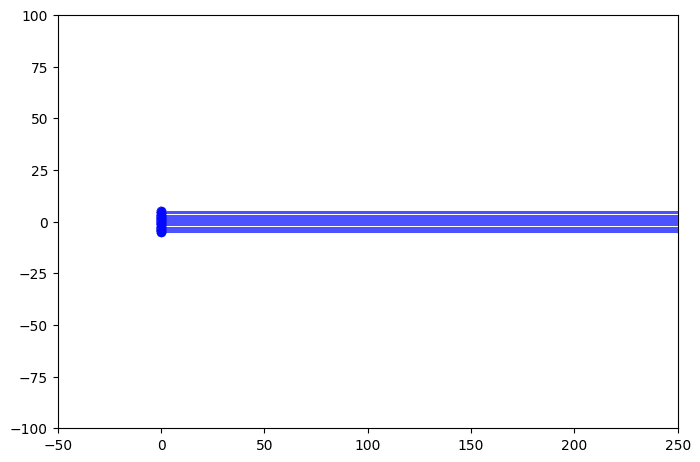
これで配置することができました。
これで「aperture」の値を変えると、ビームサイズが変わります。
import opticalpy as op

scene = op.Scene(xlim=(-50, 250), ylim=(-100, 100))

beam = op.elems.CollimatedBeam(aperture=50, scene=scene)

scene.plot()

実行結果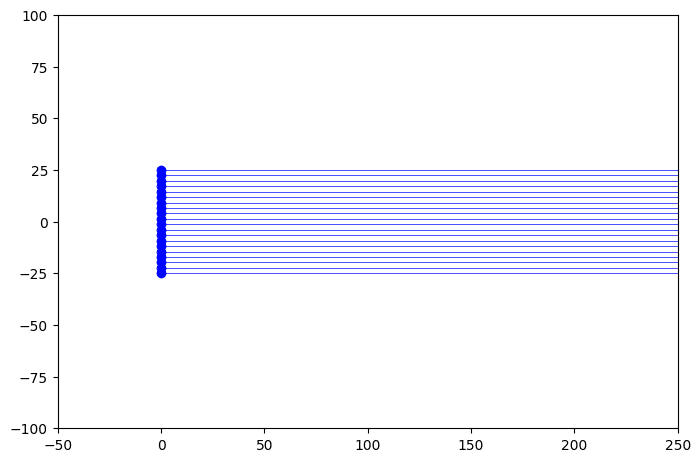
「aperture」はCollimatedBeam特有の引数ですが、ここからは他の光源でも使える引数だと思われます。
「hole=値」とすると光源の中心に穴が空いた光源となります。
import opticalpy as op

scene = op.Scene(xlim=(-50, 250), ylim=(-100, 100))

beam = op.elems.CollimatedBeam(aperture=50, scene=scene, hole=15)

scene.plot()

実行結果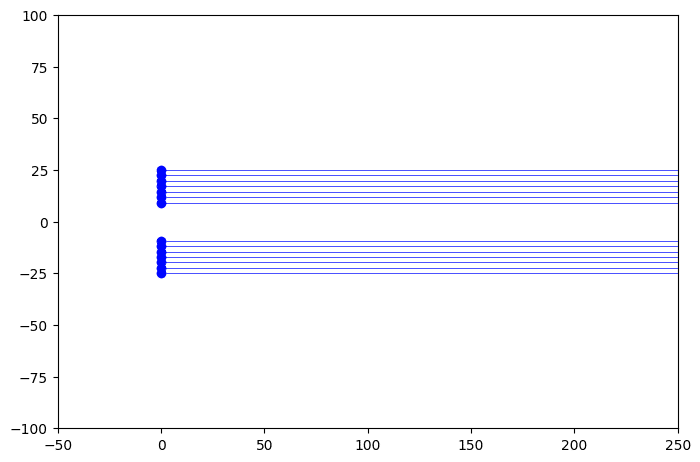
「N_sources=値」で表示する光線の数を変えることができます。
import opticalpy as op

scene = op.Scene(xlim=(-50, 250), ylim=(-100, 100))

beam = op.elems.CollimatedBeam(aperture=50, scene=scene, N_sources=100)

scene.plot()

実行結果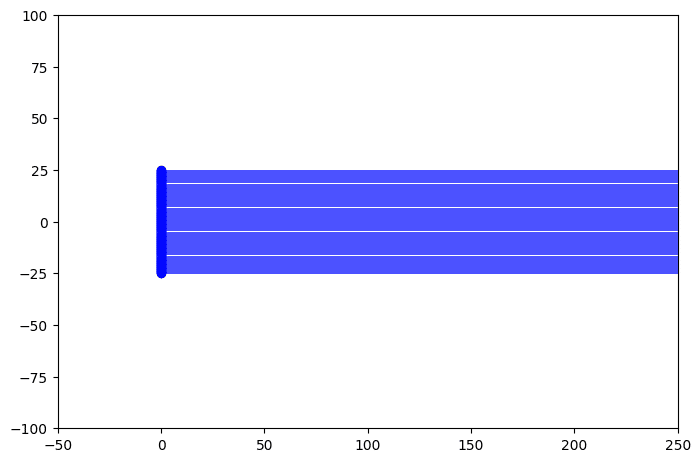
「origin=[Xの値, Yの値]」で光源の座標を指定することができます。
import opticalpy as op

scene = op.Scene(xlim=(-50, 250), ylim=(-100, 100))

beam = op.elems.CollimatedBeam(aperture=10, scene=scene, origin=[100, 50])

scene.plot()

実行結果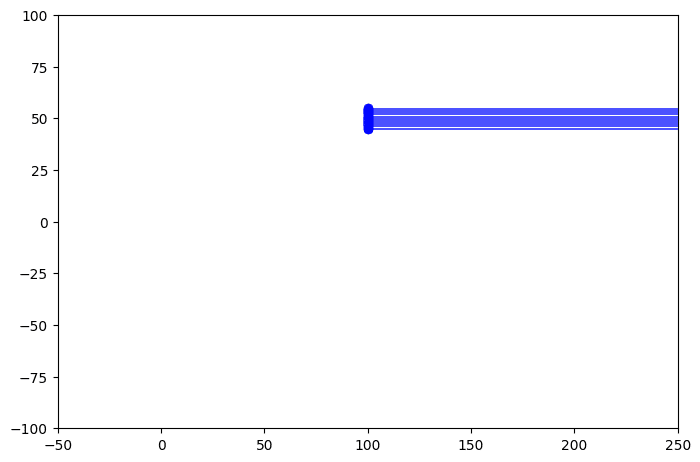
「rotation=角度」で光源の角度を変えることができます。
import opticalpy as op

scene = op.Scene(xlim=(-50, 250), ylim=(-100, 100))

beam = op.elems.CollimatedBeam(aperture=10, scene=scene, rotation=45)

scene.plot()

実行結果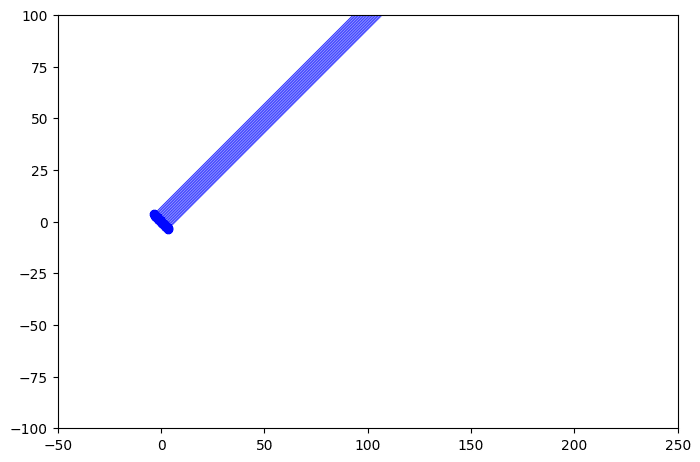
「wavelength=波長」で波長を変えることができます。
import opticalpy as op

scene = op.Scene(xlim=(-50, 250), ylim=(-100, 100))

beam = op.elems.CollimatedBeam(aperture=10, scene=scene, wavelength=625)

scene.plot()

実行結果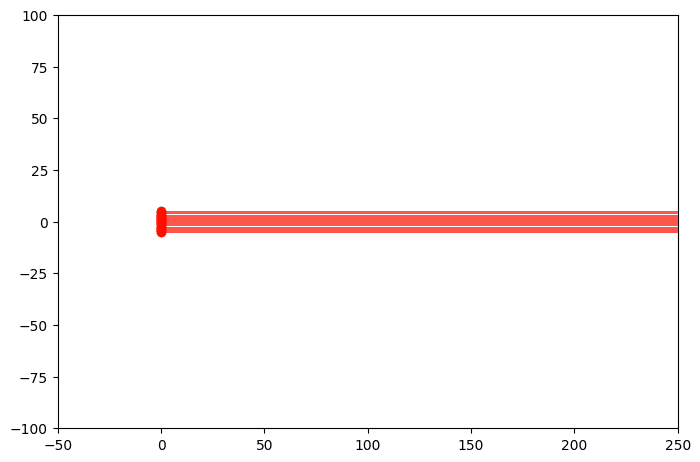
また波長は複数指定することもでき、range関数のように範囲で指定することも可能です。
import opticalpy as op

scene = op.Scene(xlim=(-50, 250), ylim=(-100, 100))

beam = op.elems.CollimatedBeam(aperture=10, scene=scene, wavelength=range(400, 701, 50))

scene.plot()

実行結果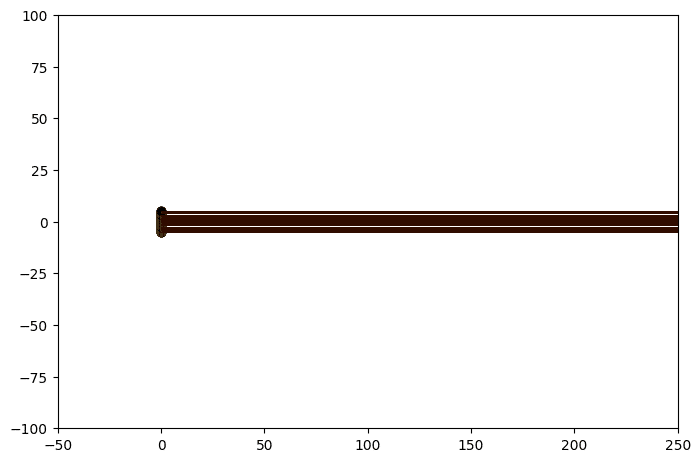
ConvergingBeam
Converging Beamとは収束ビームのことで、ある一点でビームが点状となる光源のことです。
「op.elem.ConvergingBeam(focal = 焦点距離, F = 角度, scene = scene)」のように用います。
import opticalpy as op

scene = op.Scene(xlim=(-50, 250), ylim=(-100, 100))

beam = op.elems.ConvergingBeam(focal=100, F=0.5, scene=scene)

scene.plot()

実行結果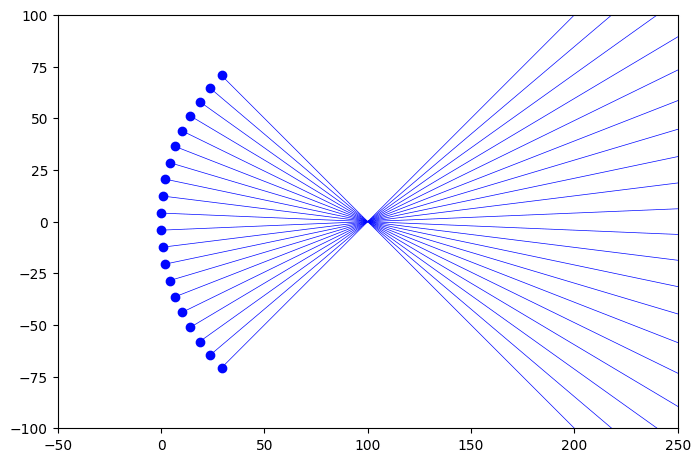
ちなみに角度は「angle = 2*np.rad2deg(np.arctan(0.5/F))」として計算されますので、「F = 0.5」のとき最大角として「±45°」から射出されることになります。
DivergingBeam
Diverging Beamとは発散ビームのことで、点光源から広がっていく光線になります。
使い方は「op.elems.DivergingBeam(angle=発散角, scene=scene)」です。
import opticalpy as op
import numpy as np

scene = op.Scene(xlim=(-50, 250), ylim=(-100, 100))

beam = op.elems.DivergingBeam(angle=20, scene=scene)

scene.plot()

実行結果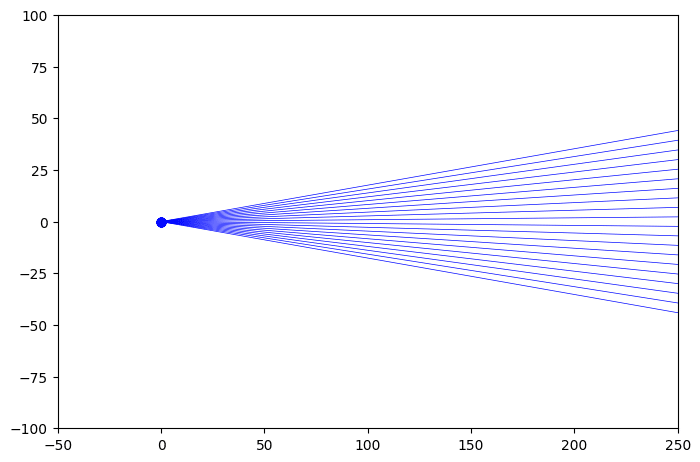
WhiteRay
WhiteRayは白色光のことですが、Opticalpyでは複数の波長をもった一点の光源として表されるようです。
そのため使い方は「op.elems.WhiteRay(wavelengths=波長範囲, scene=scene)」となります。
import opticalpy as op

scene = op.Scene(xlim=(-50, 250), ylim=(-100, 100))

beam = op.elems.WhiteRay(wavelengths=[400, 500, 600], scene=scene)

scene.plot()

実行結果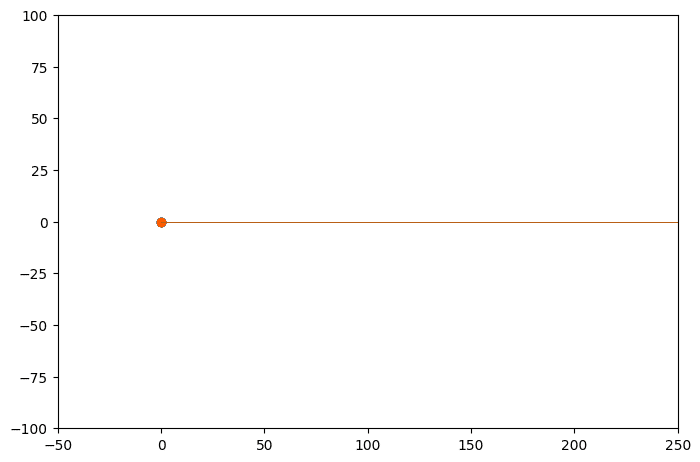
シーンや光源の中身
ここまでシーンや光源の設定方法を見てきましたが、どれも「scene」や「beam」のような変数に格納していました。
ということで中身は何だろうと覗いてみました。
import opticalpy as op

scene = op.Scene(xlim=(-50, 250), ylim=(-100, 100))

beam = op.elems.CollimatedBeam(aperture=10, scene=scene)

scene.plot()

print(beam)
print(scene)

実行結果
<opticalpy.optgroup.OpticalGroup object at 0x10c416030>
Rays   : Collimated/0, Collimated/1, Collimated/2, Collimated/3, Collimated/4, Collimated/5, Collimated/6, Collimated/7, Collimated/8, Collimated/9, Collimated/10, Collimated/11, Collimated/12, Collimated/13, Collimated/14, Collimated/15, Collimated/16, Collimated/17, Collimated/18, Collimated/19
Optics : 
「beam」の中には光線の情報が、「scene」の中には(今回は入っていませんが)光学部品の情報が入っているようです。
次回はOpticalpyでレンズの設定方法を見ていきましょう。
ではでは今回はこんな感じで。
コメント