Opticalpy
前回、光線解析ライブラリOpticalpyのインストールと光源の設定方法を紹介しました。
今回はOpticalpyでレンズの設定方法を紹介します。
それでは始めていきましょう。
Lens
基本は「op.elems.Lens」で「Lens(radius1=上面の曲率半径, radius2=下面の曲率半径, aperture=レンズのサイズ, mid_width=レンズの厚み, n=屈折率, scene=シーン, origin=[Xの位置, Yの位置], rotation=レンズの角度)」としてレンズを設定します。
import opticalpy as op
import numpy as np

scene = op.Scene(xlim=(-50, 250), ylim=(-100, 100))

beam = op.elems.DivergingBeam(angle=20, scene=scene)
lens1 = op.elems.Lens(radius1=30, radius2=25, aperture=50, mid_width=20, n=1.45, scene=scene, origin=(50, 0), rotation=90)

scene.plot()

実行結果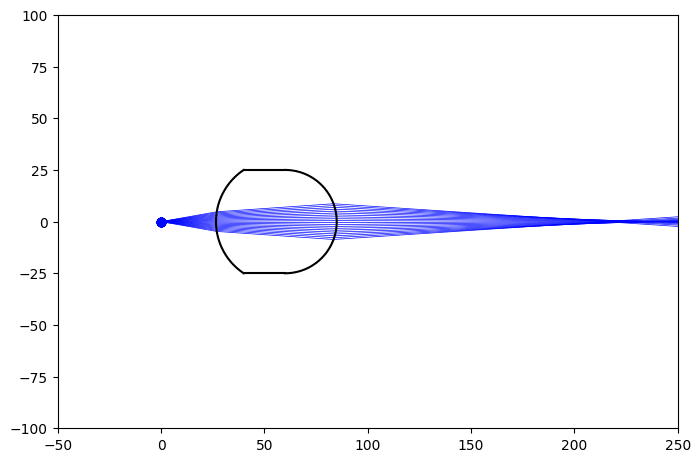
結構重要なのが「rotation」で、通常、光源を左に配置すると思いますが、その場合、「rotation=90」としてレンズの角度を90°変えてやる必要があります。
また「mid_width」、もしくはこれ以降で「width」で設定するレンズの厚みは曲部の厚みは入っておらず、両曲部の間の厚みですのでご注意ください。
Prism
「op.elems.Prism」ではプリズムを作成することができます。
「Prism(size=プリズムのサイズ, angles=[頂点1の角度, 頂点2の角度, 頂点3の角度], n=屈折率, sene=シーン, origin=[Xの位置, Yの位置], rotation=レンズの角度)」としてプリズムを設定します。
import opticalpy as op
import numpy as np

scene = op.Scene(xlim=(-50, 250), ylim=(-100, 100))

beam = op.elems.DivergingBeam(angle=20, scene=scene)
lens1 = op.elems.Prism(size=20, angles=[60, 60, 60], n=1.45, scene=scene, origin=(50, 0))

scene.plot()

実行結果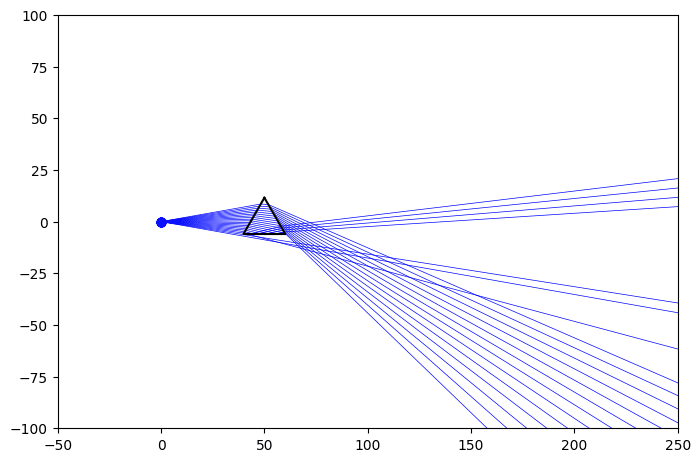
SchmidtCorrector
「SchmidtCorrector」はシュミット式補正レンズ(?)のことらしいです。
元々Opticalpyは望遠鏡のレンズの設計などを得意としているようなので、こういった望遠鏡用のレンズも準備されているのでしょう。
「SchmidtCorrector(aperture=レンズのサイズ, radius=曲率半径, width=レンズの厚み, n=屈折率, scene=シーン, origin=[Xの位置, Yの位置], rotation=レンズの角度)」としてレンズを設定します。
import opticalpy as op
import numpy as np

scene = op.Scene(xlim=(-50, 250), ylim=(-100, 100))

beam = op.elems.DivergingBeam(angle=20, scene=scene)
lens1 = op.elems.SchmidtCorrector(aperture=20, radius=10, width=10, n=1.45, scene=scene, origin=(50, 0), rotation=90)

scene.plot()

実行結果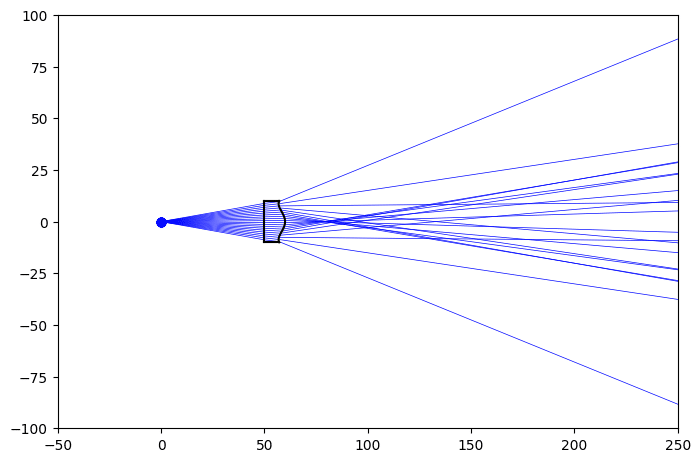
ThinBackFlatLens
「op.elems.ThinBackFlatLens」はレンズの後ろ側が平らになっているレンズです。
「ThinBackFlatLens(focal=焦点距離, aperture=レンズのサイズ, n=屈折率, width=レンズの厚み, scene=scene, origin=[Xの位置, Yの位置], rotation=レンズの角度)」として設定します。
import opticalpy as op
import numpy as np

scene = op.Scene(xlim=(-50, 250), ylim=(-100, 100))

beam = op.elems.DivergingBeam(angle=20, scene=scene)
lens1 = op.elems.ThinBackFlatLens(focal=50, aperture=30, n=1.45, width=50, scene=scene, origin=(50, 0), rotation=90)

scene.plot()

実行結果
ThinFrontFlatLens
「op.elems.ThinFrontFlatLens」はレンズの前側が平らになっているレンズです。
「ThinFrontFlatLens(focal=焦点距離, aperture=レンズのサイズ, n=屈折率, width=レンズの厚み, scene=scene, origin=[Xの位置, Yの位置], rotation=レンズの角度)」として設定します。
import opticalpy as op
import numpy as np

scene = op.Scene(xlim=(-50, 250), ylim=(-100, 100))

beam = op.elems.DivergingBeam(angle=20, scene=scene)
lens1 = op.elems.ThinFrontFlatLens(focal=50, aperture=30, n=1.45, width=50, scene=scene, origin=(50, 0), rotation=90)

scene.plot()

実行結果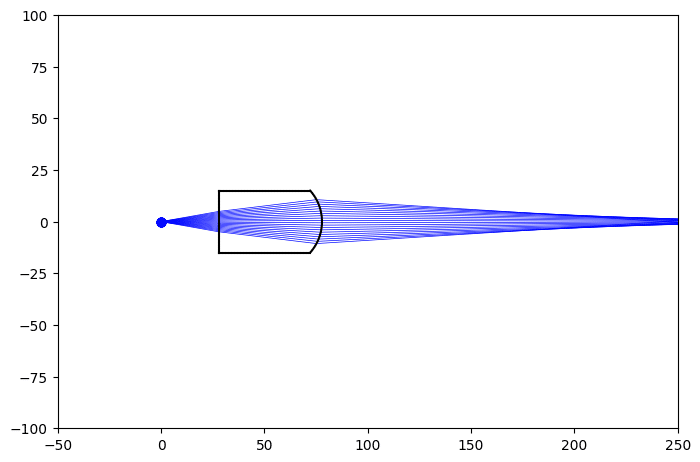
ThinSymmetricalLens
「op.elems.ThinSymmetricalLens」はレンズの両面の曲率半径が同じで、その間に厚みがあるレンズです。
「ThinSymmetricalLens(focal=焦点距離, aperture=レンズのサイズ, n=屈折率, width=レンズの厚み, scene=scene, origin=[Xの位置, Yの位置], rotation=レンズの角度)」として設定します。
import opticalpy as op
import numpy as np

scene = op.Scene(xlim=(-50, 250), ylim=(-100, 100))

beam = op.elems.DivergingBeam(angle=20, scene=scene)
lens1 = op.elems.ThinSymmetricalLens(focal=50, aperture=20, n=1.45, width=10, scene=scene, origin=(50, 0), rotation=90)

scene.plot()

実行結果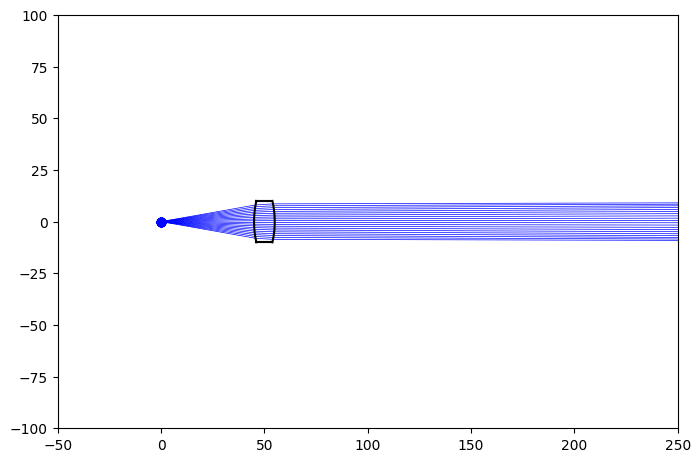
基本的には「Lens」をメインで使っていくのかなという感じを受けました。
次回はOpticalpyの回折格子の設定方法を紹介します。
ではでは今回はこんな感じで。
コメント