pptx
前回、Pythonのpptxを使ってPythonでパワーポイントを操作する方法としてプレゼンテーション、スライドの作成、画像の貼り付け方法を紹介しました。
今回はpptxを使ってパワーポイントに同じサイズの複数の画像を整列させて貼り付ける方法を紹介します。
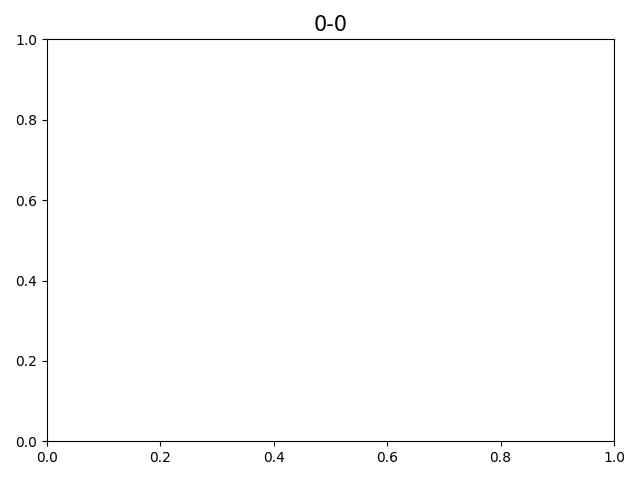
まずは貼り付ける画像を作成するため、matplotlibを使ってこんなプログラムを作成してみました。
import matplotlib.pyplot as plt

rows = 2
columns = 3

for row in range(rows):
    for column in range(columns):
        fig = plt.figure()
        plt.clf()

        plt.title(f"{row}-{column}", fontsize=15)

        fig.tight_layout()
        plt.savefig(f"{row}-{column}.png")
これを実行するとグラフタイトルが「0-0.png」の様に「行番号-列番号.png」という空のグラフが作成されます。
出てきたグラフをpptxを使って綺麗に並べてみます。
それでは始めていきましょう。
パワーポイントに同じサイズの複数の画像を整列させて貼り付ける方法
今回はまずプログラム全体を先にお見せします。
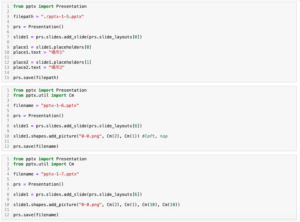
from pptx import Presentation
from pptx.util import Cm
import os

rows = 2
columns = 3

top_space = 2
bottom_space = 2
left_space = 1
right_space = 1

input_fig_width = 16.26
input_fig_height = 12.19

slide_width = 33.867
slide_height = 19.05

filepath = "./pptx-2-1.pptx"

prs = Presentation()

prs.slide_width = Cm(slide_width)
prs.slide_height = Cm(slide_height)

slide1 = prs.slides.add_slide(prs.slide_layouts[6])

img_files = sorted([file for file in os.listdir("./") if file.endswith(".png")])

fig_width_temp = (slide_width-left_space-right_space)/columns
fig_height_temp = (slide_height-top_space-bottom_space)/rows

if input_fig_width/fig_width_temp >= input_fig_height/fig_height_temp:
    ratio = round(input_fig_width/fig_width_temp, 2)
else:
    ratio = round(input_fig_height/fig_height_temp, 2)

fig_width = round(input_fig_width/ratio, 2)
fig_height = round(input_fig_height/ratio, 2)

place_list = []
for row in range(rows):
    for column in range(columns):
        left_position = round(left_space + column * fig_width, 2)
        top_position = round(top_space + row * fig_height, 2)
        place_list.append([left_position, top_position])

for file, place in zip(img_files, place_list):
    slide1.shapes.add_picture(file, Cm(place[0]), Cm(place[1]), Cm(fig_width), Cm(fig_height))

prs.save(filepath)
順に上から解説していきましょう。
最初は使うライブラリのインポートです。
from pptx import Presentation
from pptx.util import Cm
import os
osモジュールと前回出てきたpptxのPresentationとpptx.utilのCmを使います。
pptx.utilのCmを使うため、入力している単位はセンチメートルです。
次に入力するパラメータです。
rows = 2
columns = 3

top_space = 2
bottom_space = 2
left_space = 1
right_space = 1

input_fig_width = 16.26
input_fig_height = 12.19

slide_width = 33.867
slide_height = 19.05

filepath = "./pptx-2-1.pptx"
「rows」は行数、「columns」は列数です。
「top_space」、「bottom_space」、「left_space」、「right_space」はそれぞれ上下左右の空白地のサイズです。
例えば上にタイトルを入れたいというときには「top_space」を広めにしたり、下に結論を入れたいというときには「bottom_space」を広めにしたりといった感じで使用します。
「input_fig_width」と「input_fig_height」は貼り付ける画像の幅と高さのサイズです。
「slide_width」と「slide_height」はスライドの幅と高さです。
4:3のときと16:9の場合はこの様なサイズになります。
| 幅(cm) | 高さ(cm) | |
| 4:3 | 24.5 | 19.05 |
| 16:9 | 33.867 | 19.05 |
最後の「filepath」は出力ファイルのパスです。
次からはスライドを作成していきます。
prs = Presentation()

prs.slide_width = Cm(slide_width)
prs.slide_height = Cm(slide_height)

slide1 = prs.slides.add_slide(prs.slide_layouts[6])
ここは前回やった通りなので解説を割愛します。
今回使うスライドレイアウトはまっさらなスライド「prs.slide_layouts[6]」を使います。
次に貼り付ける画像のファイル名のリストを作成します。
img_files = sorted([file for file in os.listdir("./") if file.endswith(".png")])今回の場合は貼り付ける画像がこのPythonスクリプトと同じ場所にある前提で作成していますので「os.listdir(“./”)」となっています。
ここは各自の状態に合わせてください。
次にスライドのサイズと画像サイズ、行数、列数から仮の1枚の画像サイズを算出します。
fig_width_temp = (slide_width-left_space-right_space)/columns
fig_height_temp = (slide_height-top_space-bottom_space)/rows
仮のというのはここで算出した幅、高さを使ってしまうと、画像のアスペクトが変わってしまいます。
そのため次で元の画像サイズと算出した画像サイズを使って縮小率を算出し、より大きい縮小率(画像としてより小さくなる方)の値を取得し、貼り付ける画像サイズを算出します。
if input_fig_width/fig_width_temp >= input_fig_height/fig_height_temp:
    ratio = round(input_fig_width/fig_width_temp, 2)
else:
    ratio = round(input_fig_height/fig_height_temp, 2)

fig_width = round(input_fig_width/ratio, 2)
fig_height = round(input_fig_height/ratio, 2)
貼り付ける画像サイズが決まったら、今度は貼り付ける場所を計算し、リストに格納します。
place_list = []
for row in range(rows):
    for column in range(columns):
        left_position = round(left_space + column * fig_width, 2)
        top_position = round(top_space + row * fig_height, 2)
        place_list.append([left_position, top_position])
貼り付ける場所としては画像の左と上の場所が必要であるため、左の空白地、上の空白地と貼り付ける画像のサイズ、行数、列数を使って算出します。
最後に画像を貼り付けて、保存します。
for file, place in zip(img_files, place_list):
    slide1.shapes.add_picture(file, Cm(place[0]), Cm(place[1]), Cm(fig_width), Cm(fig_height))

prs.save(filepath)
行数、列数の他、上下左右の空白地のサイズや元の画像のサイズなど最初は決めるパラメータが多い様に見えますが、行数、列数以外は一度決めてしまえばそこまで変えるものではないと思うので、そこまで手間にならないかと思います。
PIL(Pillow)とかOpenCVとか使えば画像サイズも取得できそうですが、とりあえずシンプルにこんな感じでいいかなというプログラムとしてみました。
次回はPythonで小数や整数を四捨五入するround関数を紹介します。
ではでは今回はこんな感じで。
コメント