Streamlit
前回、PythonのWebアプリフレームワークStreamlitの基本的なウィジェットとその使い方を紹介しました。
今回はStreamlitのレイアウトに関するウィジェットを紹介していきます。
レイアウトに関するウィジェットとしてはサイドバーを作成する「st.sidebar」、カラムを作成する「st.columns」、タブを作成する「st.tab」、エキスパンダーを作成する「st.expander」があります。
順に見ていってみましょう。
サイドバー:st.sidebar
「st.sidebar」ではサイドバーにウィジェットを配置することができます。
その使い方としては「st.sidebar.ウィジェット」というように各ウィジェットの前に「st.sidebar」を追加します。
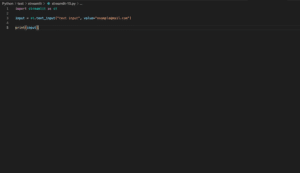
import streamlit as st

button = st.sidebar.button("button")
text_input = st.sidebar.text_input("text_input")
checkbox = st.sidebar.checkbox("checkbox")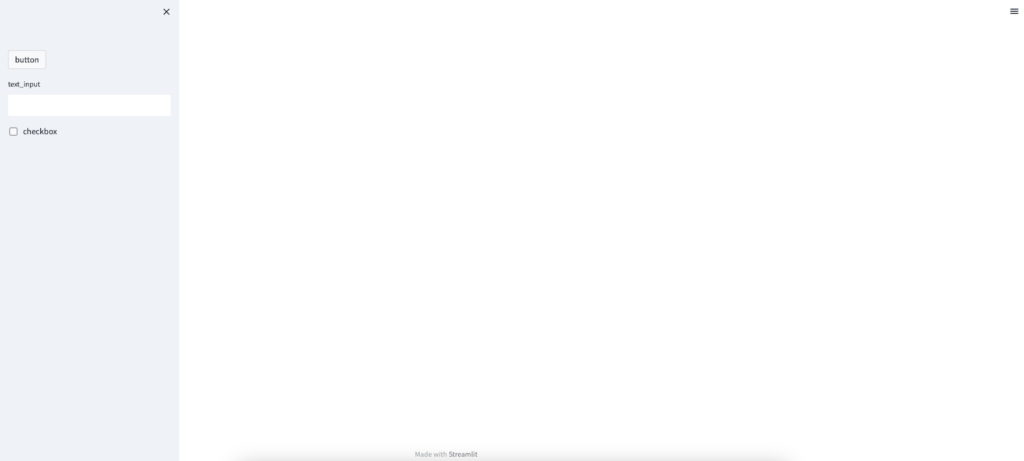
左側の灰色の部分がサイドバーです。
サイドバーの右上の✖️をクリックするとサイドバーは左端に収納されます。
カラム:st.column
「st.column」ではカラムを作成することができます。
通常、単にウィジェットを順番に作成していくと、このように1行ずつ使って縦に並んでいってしまいます。
import streamlit as st

input1 = st.button("col1 button")
input2 = st.text_input("col2 text_input")
input3 = st.checkbox("col3 checkbox")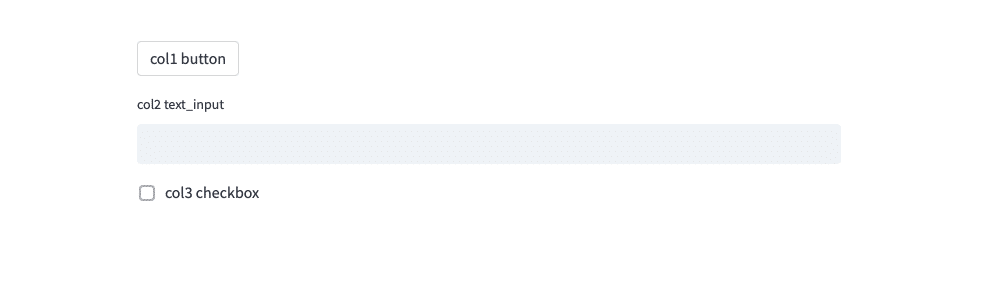
そしてカラムを作成するとこれらを1行にまとめることができます。
基本的な使い方は「カラム名1, カラム名2, カラム名3… = st.columns(カラム数)」とします。
そして「カラム名.ウィジェット」とすることでそれぞれのカラムにウィジェットを配置します。
import streamlit as st

col1, col2, col3 = st.columns(3)

button = col1.button("col1 button")
text_input = col2.text_input("col2 text_input")
checkbox = col3.checkbox("col3 checkbox")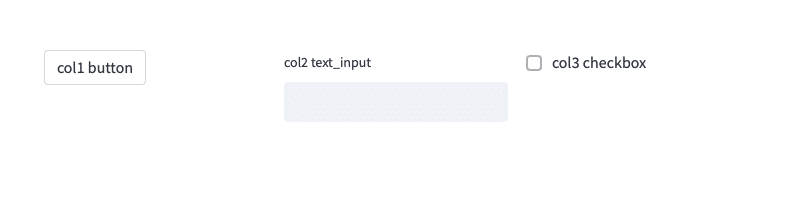
「st.columns(カラム数)」とした場合は、それぞれのカラムの幅は等分に分割されます。
もしそれぞれのカラムの幅を変えたい場合は「st.columns([カラムの幅1, カラムの幅2, カラムの幅3…])」というようにそれぞれのカラムの幅をリストとして指定します。
import streamlit as st

col1, col2, col3 = st.columns([3, 2, 1])

button = col1.button("col1 button")
text_input = col2.text_input("col2 text_input")
checkbox = col3.checkbox("col3 checkbox")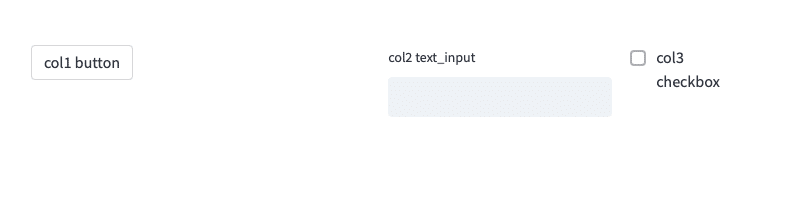
それぞれのカラムに複数行入れていく場合は何度も「カラム名.ウィジェット」でウィジェットを追加していきます。
import streamlit as st

col1, col2, col3 = st.columns(3)

button1 = col1.button("col1 button1")
button2 = col1.button("col1 button2")

text_input1 = col2.text_input("col2 text_input1")
text_input2 = col2.text_input("col2 text_input2")

checkbox1 = col3.checkbox("col3 checkbox1")
checkbox2 = col3.checkbox("col3 checkbox2")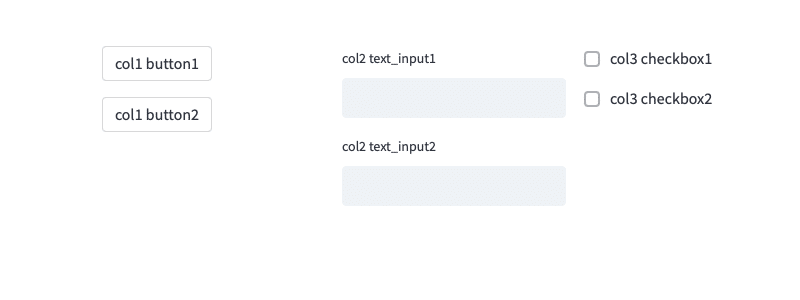
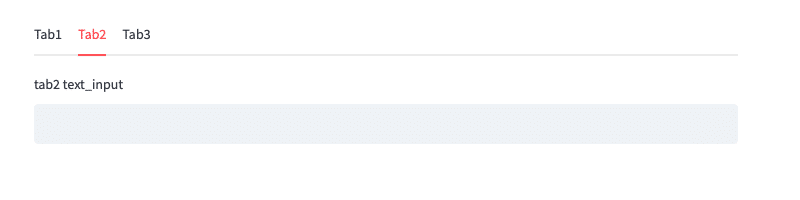
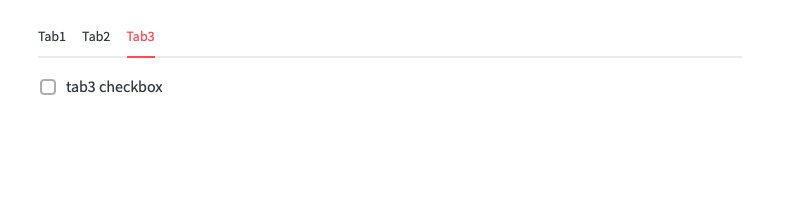
タブ:st.tabs
「st.tabs」ではタブを作成することができます。
使い方は「タブ名1, タブ名2, タブ名3… = st.tabs([“タブ表示名1”, “タブ表示名2”, “タブ表示名3″…])」としてタブを作成したのちに、「タブ名.ウィジェット」でウィジェットを配置します。
import streamlit as st

tab1, tab2, tab3 = st.tabs(["Tab1", "Tab2", "Tab3"])

tab1.button("tab1 button")

tab2.text_input("tab2 text_input")

tab3.checkbox("tab3 checkbox")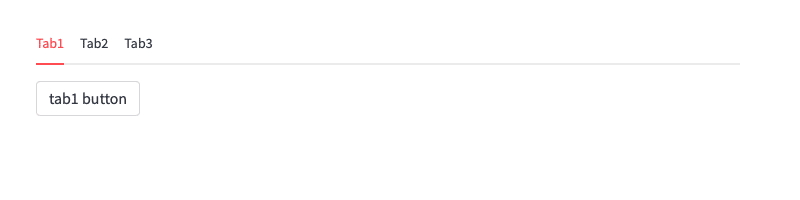
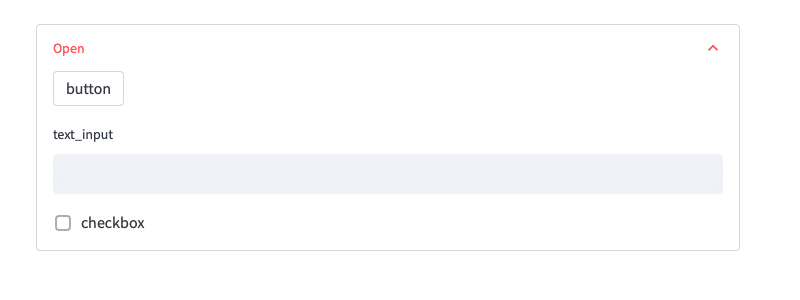
エキスパンダー:st.expander
「st.expander」ではエキスパンダーを作成することができます。
エキスパンダーは他のレイアウト用ウィジェットと異なり、with文を使って作成します。
import streamlit as st

with st.expander("Open"):
    button = st.button("button")
    text_input = st.text_input("text_input")
    checkbox = st.checkbox("checkbox")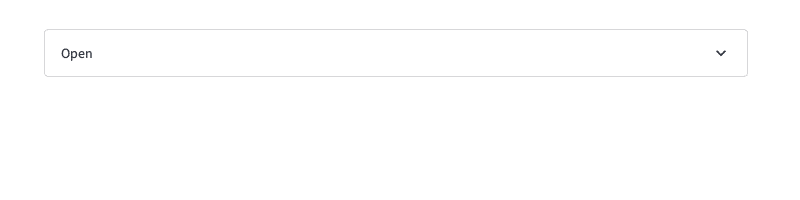
今回紹介したレイアウト用ウィジェットを使うと、色々な配置をすることができるので、使い勝手や見栄えを良くすることできます。
次回は「st.text」と「st.write」の違いを見ていきましょう。
ではでは今回はこんな感じで。
コメント