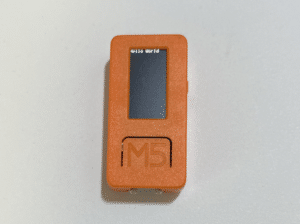
M5StickC
前回、M5stickのHello Worldのスケッチ例を見てみました。
今回は画面の出力の仕方を学ぶため「TFT_Print_Test」のスケッチ例を見てみましょう。
場所は「ファイル > スケッチ例 > M5StickC > Advanced > Display > TFT_Print_Test」です。
それでは始めましょう。
プログラム全体
まずはプログラム全体を見てみましょう。
/*
Test the M5.Lcd.print() viz embedded M5.Lcd.write() function
This sketch used font 2, 4, 7
Make sure all the display driver and pin comnenctions are correct by
editting the User_Setup.h file in the TFT_eSPI library folder.
#########################################################################
###### DON'T FORGET TO UPDATE THE User_Setup.h FILE IN THE LIBRARY ######
#########################################################################
*/
#include <M5StickC.h>
#define TFT_GREY 0x5AEB // New colour
void setup(void) {
M5.begin();
M5.Lcd.setRotation(3);
}
void loop() {
// Fill screen with grey so we can see the effect of printing with and without
// a background colour defined
M5.Lcd.fillScreen(TFT_GREY);
// Set "cursor" at top left corner of display (0,0) and select font 2
// (cursor will move to next line automatically during printing with 'M5.Lcd.println'
// or stay on the line is there is room for the text with M5.Lcd.print)
M5.Lcd.setCursor(0, 0, 2);
// Set the font colour to be white with a black background, set text size multiplier to 1
M5.Lcd.setTextColor(TFT_WHITE,TFT_BLACK);
M5.Lcd.setTextSize(1);
// We can now plot text on screen using the "print" class
M5.Lcd.println("Hello World!");
// Set the font colour to be yellow with no background, set to font 6
M5.Lcd.setTextColor(TFT_YELLOW);
M5.Lcd.setTextFont(4);
M5.Lcd.println(1234.56);
// Set the font colour to be red with black background, set to font 4
M5.Lcd.setTextColor(TFT_RED,TFT_BLACK); M5.Lcd.setTextFont(4);
//M5.Lcd.println(3735928559L, HEX); // Should print DEADBEEF
// Set the font colour to be green with black background, set to font 4
M5.Lcd.setTextColor(TFT_GREEN,TFT_BLACK);
M5.Lcd.setTextFont(2);
M5.Lcd.println("Groop");
M5.Lcd.println("I implore thee,");
delay(2000);
M5.Lcd.fillScreen(TFT_GREY);
M5.Lcd.setCursor(0, 0, 2);
// Test some print formatting functions
float fnumber = 123.45;
// Set the font colour to be blue with no background, set to font 4
M5.Lcd.setTextColor(TFT_BLUE); M5.Lcd.setTextFont(2);
M5.Lcd.print("Float = "); M5.Lcd.println(fnumber); // Print floating point number
M5.Lcd.print("Binary = "); M5.Lcd.println((int)fnumber, BIN); // Print as integer value in binary
M5.Lcd.print("Hexadecimal = "); M5.Lcd.println((int)fnumber, HEX); // Print as integer number in Hexadecimal
delay(1000);
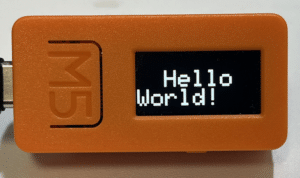
}このプログラムをM5StickCに書き込むとこんな感じの表示になります。
新しいコマンドがいっぱいなので、まずは新しいコマンドをコマンド毎に見ていくことにしましょう。
#define A B
どうやらこれはPythonでいう関数定義のdef文と同等ではないかと思われます。
ただ今回の場合は「#define TFT_GREY 0x5AEB」と「0x5AEB」を「TFT_GREY」と定義するという形で使っているようです。
つまり「#define A B」の場合、B(定数や処理)をA(関数名)として定義するというわけです。
この#define A Bの詳細は別の機会に見ていきましょう。
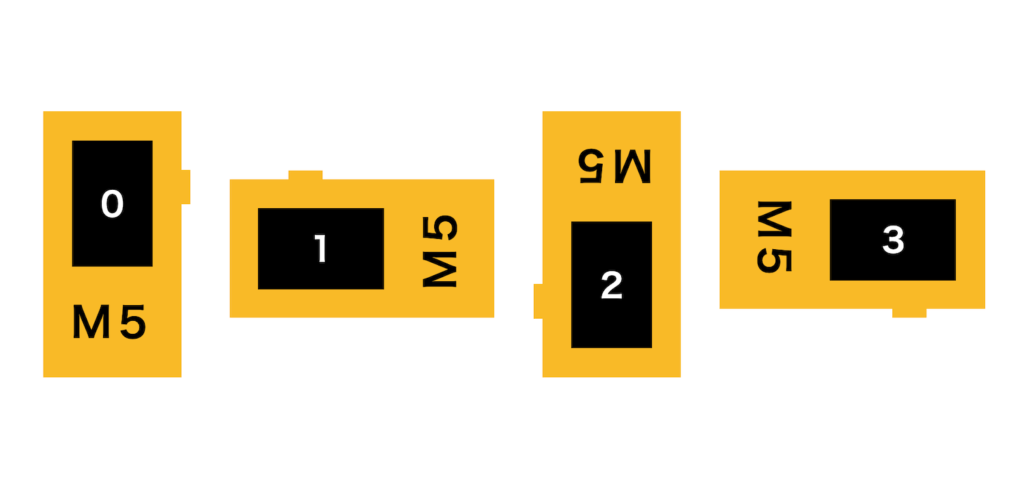
M5.Lcd.setRotation(int)
M5.Lcd.setRotation(int)は画面の向きです。
括弧内に0〜3の数字を入れて使用します。
0が縦、1が本体上部が左に来る横、2が上下反転した縦、3が本体上部が右にくる横です。
図示してみるとこんな感じです。
M5.Lcd.fillScreen(色);
次は「M5.Lcd.fillScreen(色);」です。
これは画面全体を指定した色で埋め尽くすコマンドです。
この際、色の指定方法は16ビットカラーで指定します。
通常、色はRGB(24ビット:8ビットx3色)で指定することが多いと思います。
こちらのサイトの下の方で16ビットカラーコードを24ビットカラーコードに変換できるようになっているので、ご興味あればどうぞ。
またQiitaでは24ビットカラーコードで指定し、それを16ビットカラーコードに変換して、出力させる方法がありました。
どうしても24ビットカラーで指定したいという方は試してみてください。

そしてちなみにこちらの色に関しては既に定義されているので、それぞれの名称を入力するだけで使用することができます。
// New color definitions use for all my libraries
#define TFT_BLACK       0x0000      /*   0,   0,   0 */
#define TFT_NAVY        0x000F      /*   0,   0, 128 */
#define TFT_DARKGREEN   0x03E0      /*   0, 128,   0 */
#define TFT_DARKCYAN    0x03EF      /*   0, 128, 128 */
#define TFT_MAROON      0x7800      /* 128,   0,   0 */
#define TFT_PURPLE      0x780F      /* 128,   0, 128 */
#define TFT_OLIVE       0x7BE0      /* 128, 128,   0 */
#define TFT_LIGHTGREY   0xC618      /* 192, 192, 192 */
#define TFT_DARKGREY    0x7BEF      /* 128, 128, 128 */
#define TFT_BLUE        0x001F      /*   0,   0, 255 */
#define TFT_GREEN       0x07E0      /*   0, 255,   0 */
#define TFT_CYAN        0x07FF      /*   0, 255, 255 */
#define TFT_RED         0xF800      /* 255,   0,   0 */
#define TFT_MAGENTA     0xF81F      /* 255,   0, 255 */
#define TFT_YELLOW      0xFFE0      /* 255, 255,   0 */
#define TFT_WHITE       0xFFFF      /* 255, 255, 255 */
#define TFT_ORANGE      0xFDA0      /* 255, 180,   0 */
#define TFT_GREENYELLOW 0xB7E0      /* 180, 255,   0 */
#define TFT_PINK 0xFC9F「M5.Lcd.setCursor」、「M5.Lcd.setTextColor」、「M5.Lcd.setTextSize」、「M5.Lcd.println」は全て文字の表示関係のようなので、次回まとめて色々試すことにします。
delay(ミリ秒);
ということで、もう一つの新しいコマンド「delay(ミリ秒);」です。
これは単純に指定した秒数、プログラムを止めるコマンドです。
Pythonの「time」モジュールの「sleep」と同様のようですが、sleepの場合は「秒」での指定ですが、今回のdeleyの場合は「ミリ秒」、つまり1000分の1秒単位での指定ですので、ご注意ください。
またこのdelayはC言語やヘッダーファイルM5stickC.hの機能ではなく、Arduino言語の機能であるようです。
長くなってきたので、今回はここまでにしましょう。
次回は先ほどお伝えした通り、テキスト関係のコマンド「M5.Lcd.setCursor」、「M5.Lcd.setTextColor」、「M5.Lcd.setTextSize」、「M5.Lcd.println」、「M5.Lcd.print」をいじりながら勉強していきたいと思います。
ではでは今回はこんな感じで。

コメント