M5StickC
前回、M5StickCのSPIFFS領域を作成するためのスケッチ例を見てみました。
今回は続いてSPIFFS領域に書き込むためのスケッチ例を見てみましょう。
とは言っても、前回のスケッチで既に書き込むためのコマンドも出ていましたので、復習になるかもしれません。
それでも何か新しい発見があるかもしれませんので、確認してみることにします。
それでは始めていきましょう。
プログラム全体
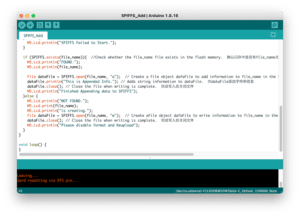
まずはプログラム全体を見てみましょう。
/*
*******************************************************************************
* Copyright (c) 2021 by M5Stack
*                  Equipped with M5StickC sample source code
*                          配套  M5StickC 示例源代码
* Visit the website for more information:https://docs.m5stack.com/en/core/m5stickc
* 获取更多资料请访问:https://docs.m5stack.com/zh_CN/core/m5stickc
*
* describe:SPIFFS write & read.  闪存文件读写
* date:2021/8/4
*******************************************************************************
*/

#include <M5StickC.h>
#include <SPIFFS.h>
String file_name = "/M5Stack/notes.txt"; //Sets the location and name of the file to be operated on.  设置被操作的文件位置和名称
bool SPIFFS_FORMAT = false; //Whether to initialize the SPIFFS.  是否初始化SPIFFS
//You don't need to format the flash file system every time you use it.
//无需每次使用闪存都进行格式化

void setup() {
  M5.begin(); //Init M5StickC.  初始化 M5StickC
  M5.Lcd.setRotation(3);  //Rotate the screen.  旋转屏幕
  if(SPIFFS_FORMAT){
    M5.Lcd.println("SPIFFS format start..."); //output format String in LCD.  在屏幕上输出格式化字符串
    SPIFFS.format();    // Formatting SPIFFS.  格式化SPIFFS
    M5.Lcd.println("SPIFFS format finish");
  }

  if(SPIFFS.begin()){ // Start SPIFFS, return 1 on success.  启动闪存文件系统,若成功返回1
    M5.Lcd.println("SPIFFS Begin.");
    //Write operation
    File dataFile = SPIFFS.open(file_name, "w");  // Create a File object dafa  File to write information to file_name in the SPIFFS.  建立File对象dafaFile用于向SPIFFS中的file_name写入信息
    dataFile.println("Hello IOT World."); // Writes string information and newlines to the dataFile.  向dataFile写入字符串信息并换行
    dataFile.close(); // Close the file when writing is complete.  完成写入后关闭文件
    M5.Lcd.println("Finished Writing data to SPIFFS");
  } else {
    M5.Lcd.println("SPIFFS Failed to Begin.\nYou need to Run SPIFFS_Add.ino first");
  }
}

void loop() {
  M5.update();  //Check whether the key is pressed.  检测按键是否按下
  if(M5.BtnA.isPressed()){ //If the button is pressed.  如果按键按下
    if (SPIFFS.exists(file_name)){  //Check whether the file_name file exists in the flash memory.  确认闪存中是否有file_name文件
      M5.Lcd.println("FOUND.");
      M5.Lcd.println(file_name);
    } else {
      M5.Lcd.println("NOT FOUND.");
      M5.Lcd.println(file_name);
    }
    File dataFile = SPIFFS.open(file_name, "r");   // Create aFile object dafaFile to read information to file_name in the SPIFFS.  建立File对象dafaFile用于向SPIFFS中的file_name读取信息
    for(int i=0; i<dataFile.size(); i++){ //Reads file contents and outputs file information through the M5.Lcd port monitor.  读取文件内容并且通过串口监视器输出文件信息
      M5.Lcd.print((char)dataFile.read());
    }
    dataFile.close(); //Close the file after reading the file.  完成文件读取后关闭文件
    delay(200);
  }
}
「setup関数」はほぼ同じですが、1箇所大きく違うのは「bool SPIFFS_FORMAT = false;」となっているところです。
この「SPIFFS_FORMAT」はSPIFFS領域をフォーマットするかどうかの値でした。
ここで「false」となっているということは、このプログラムではフォーマットしないことを選択しているわけです。
またコメントにも「You don’t need to format the flash file system every time you use it.」と書かれていることから、毎回使用前にフォーマットする必要はないということが分かります。
loop関数部分
前回と全く違うのは「loop関数」部分です。
前回のスケッチでは「loop関数」の中身は空で何もプログラミングされていませんでした。
今回はこんな感じのプログラムが書かれています。
void loop() {
  M5.update();  //Check whether the key is pressed.  检测按键是否按下
  if(M5.BtnA.isPressed()){ //If the button is pressed.  如果按键按下
    if (SPIFFS.exists(file_name)){  //Check whether the file_name file exists in the flash memory.  确认闪存中是否有file_name文件
      M5.Lcd.println("FOUND.");
      M5.Lcd.println(file_name);
    } else {
      M5.Lcd.println("NOT FOUND.");
      M5.Lcd.println(file_name);
    }
    File dataFile = SPIFFS.open(file_name, "r");   // Create aFile object dafaFile to read information to file_name in the SPIFFS.  建立File对象dafaFile用于向SPIFFS中的file_name读取信息
    for(int i=0; i<dataFile.size(); i++){ //Reads file contents and outputs file information through the M5.Lcd port monitor.  读取文件内容并且通过串口监视器输出文件信息
      M5.Lcd.print((char)dataFile.read());
    }
    dataFile.close(); //Close the file after reading the file.  完成文件读取后关闭文件
    delay(200);
  }
ここでまず新しく出てきたコマンドは「M5.update();」ですが、まずはその次の行を見てみます。
次の行では「if(M5.BtnA.isPressed())」と書かれており、「Aボタンが押されたとき」という条件分岐をしています。
しかし「Aボタンが押されたかどうか」の情報の取得を、この条件分岐の前でする必要があります。
つまり「M5.update();」のコマンドは、ボタンの状態を取得するためのコマンドであり、その情報を使って、「if(M5.BtnA.isPressed())」でボタンが押されたかどうかを判断しているということなのです。
ということでボタン操作をする場合は「M5.update();」を忘れないようにしましょう。
また別の機会にお話ししますが、最後の「delay(200);」もボタン操作において重要な意味を持つので忘れないようにしてください。
そしてその後のこの部分は最初に定義しているファイルが存在するかどうかを確認し、その結果を表示するためのプログラムです。
これも前回に似たプログラムが出ていましたね。
    if (SPIFFS.exists(file_name)){  //Check whether the file_name file exists in the flash memory.  确认闪存中是否有file_name文件
      M5.Lcd.println("FOUND.");
      M5.Lcd.println(file_name);
    } else {
      M5.Lcd.println("NOT FOUND.");
      M5.Lcd.println(file_name);
    }
次の部分は前回には出てきていない部分です。
    File dataFile = SPIFFS.open(file_name, "r");   // Create aFile object dafaFile to read information to file_name in the SPIFFS.  建立File对象dafaFile用于向SPIFFS中的file_name读取信息
    for(int i=0; i<dataFile.size(); i++){ //Reads file contents and outputs file information through the M5.Lcd port monitor.  读取文件内容并且通过串口监视器输出文件信息
      M5.Lcd.print((char)dataFile.read());
    }
    dataFile.close(); //Close the file after reading the file.  完成文件读取后关闭文件
    delay(200);
  }
「File dataFile = SPIFFS.open(file_name, “r”);」でファイルを開きます。
そして次のfor文の部分は、一文字ずつ取得し、M5StickCのディスプレイに表示しているようです。
for(int i=0; i<dataFile.size(); i++){ //Reads file contents and outputs file information through the M5.Lcd port monitor.  读取文件内容并且通过串口监视器输出文件信息
      M5.Lcd.print((char)dataFile.read());
    }
ちなみに「.size()」というコマンドが出てきますが、これはC言語ではなく、C++言語のコマンドのようです。
C言語の基本を前に勉強しましたが、実はArduino言語はC/C++言語というC言語とC++言語が混ざっている言語らしいです。
ということでこのようなC++言語のコマンドも出てきますが、それはその都度勉強することにしましょう。
そして「.size()」ではその文字列の数を返してきます。
試しにC++言語でこんな感じのプログラムを書いてみました。
#include <stdio.h>
#include <string>
#include <iostream>
using namespace std;

int main()
{
     string test = "abc";

    int i;

    for(i = 0; i < test.size(); i++){
        printf("%d-%c ", i, test[i]);
    }
}

実行結果
0-a 1-b 2-c
前に勉強したC言語とはそこそこ違いますが、プログラム的には難しくないので、理解できると思います。
「string test = “abc”;」で変数testに文字列abcを格納します。
そして「for(i = 0; i < test.size(); i++)」で整数 i を1ずつ増加させながら、文字列の長さになるまで繰り返します。
最後に「printf(“%d-%c “, i, test[i]);」、i の数とその値に対応する文字列の場所の文字を表示しています。
これで結果が「0-a 1-b 2-c」と表示されたことから、「.size()」は文字列の長さを取得していることが確認できました。
もし「.size()」が文字列の塊の数をみていたのなら、実行結果は「0-abc」となるだろうと考えられるからです。
と言うことでもとのスケッチ例に戻ると「for(int i=0; i<dataFile.size(); i++)」で文字列の長さになるまで、整数 i を1ずつ増加させ、繰り返しをします。
そしてそれを「M5.Lcd.print((char)dataFile.read());」でM5StickCのディスプレイに表示させているというわけです。
これでSPIFFSのスケッチ例は完了です。
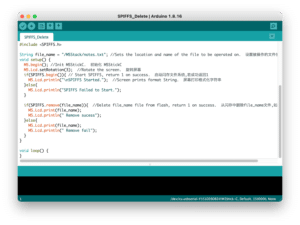
次回はこのままの流れで「SPIFFS_Delete」のスケッチ例を見ていきましょう。
ではでは今回はこんな感じで。

コメント