Bootstrap Studio
前回、Bootstrap Studioで作成した漢字間違い探しクイズのindex.htmlで動画と背景画像のリンクの修正を行いました。
今回はplay.htmlでランダムな問題が出題されるようにプログラムを作成していきます。
まずはフォルダ構造の確認から。
findthedifferentkanji
├── contents
│   ├── __init__.py
│   ├── admin.py
│   ├── apps.py
│   ├── migrations
│   │   └── __init__.py
│   ├── models.py
│   ├── static
│   │   └── contents
│   │       └── assets
│   │           ├── bootstrap
│   │           │   ├── css
│   │           │   │   └── bootstrap.min.css
│   │           │   └── js
│   │           │       └── bootstrap.min.js
│   │           ├── css
│   │           │   ├── Footer-Dark.css
│   │           │   ├── Navigation-Clean.css
│   │           │   └── styles.css
│   │           ├── img
│   │           │   ├── FindTheDifferentKanji_1920x600.jpg
│   │           │   ├── about.png
│   │           │   ├── make.png
│   │           │   ├── play.png
│   │           │   ├── question.png
│   │           │   └── twitter.png
│   │           └── video
│   │               └── FindTheDifferentKANJI.mp4
│   ├── templates
│   │   └── contents
│   │       ├── about.html
│   │       ├── index.html
│   │       ├── make.html
│   │       └── play.html
│   ├── tests.py
│   ├── urls.py
│   └── views.py
├── db.sqlite3
├── findthedifferentkanji
│   ├── __init__.py
│   ├── asgi.py
│   ├── settings.py
│   ├── urls.py
│   └── wsgi.py
└── manage.py
またベースとなるプログラムは、こちらの記事で作成していたプログラムです。
細かい点などわからない部分があったら、こちらの記事も参考にしてください。
それでは始めていきましょう。
設定ファイルとフォントファイルの配置
まずは設定ファイルとフォントファイルの配置を行なっていきます。
設定ファイルは2つあり、一つは問題を収録した「question.json」、もう一つはフォントの名前と場所を収録した「fonts.json」です。
またフォントファイルはこんな感じで一つずつフォルダ分けして、ライセンスファイルとともに保存してあります。
fonts
├── Dela_Gothic_One
│   ├── DelaGothicOne-Regular.ttf
│   └── OFL.txt
├── Hachi_Maru_Pop
│   ├── HachiMaruPop-Regular.ttf
│   └── OFL.txt
├── New_Tegomin
│   ├── NewTegomin-Regular.ttf
│   └── OFL.txt
├── Noto_Sans_JP
│   ├── NotoSansJP-Regular.otf
│   └── OFL.txt
├── Potta_One
│   ├── OFL.txt
│   └── PottaOne-Regular.ttf
└── Shippori_Mincho
    ├── OFL.txt
    └── ShipporiMincho-Regular.ttf
これらをアプリのフォルダにコピーしていきますが、設定ファイルに関しては問題を追加したり、フォントを追加したりとまだまだいじっていく可能性があるので、なるべく扱いやすいところに保存をしたいと思います。
ということで
- 「question.json」と「fonts.json」は contentsフォルダ内に「settings」フォルダを作成し、その中にコピー
- フォントは static > contents > assets の下に fontsフォルダごとコピー
という形にしてみました。
findthedifferentkanji
├── contents
│   ├── __init__.py
│   ├── admin.py
│   ├── apps.py
│   ├── migrations
│   │   └── __init__.py
│   ├── models.py
│   ├── settings
│   │   ├── fonts.json
│   │   └── question.json
│   ├── static
│   │   └── contents
│   │       └── assets
│   │           ├── ...
│   │           └── fonts
│   │               ├── Dela_Gothic_One
│   │               │   ├── DelaGothicOne-Regular.ttf
│   │               │   └── OFL.txt
│   │               ├── Hachi_Maru_Pop
│   │               │   ├── HachiMaruPop-Regular.ttf
│   │               │   └── OFL.txt
│   │               ├── New_Tegomin
│   │               │   ├── NewTegomin-Regular.ttf
│   │               │   └── OFL.txt
│   │               ├── Noto_Sans_JP
│   │               │   ├── NotoSansJP-Regular.otf
│   │               │   └── OFL.txt
│   │               ├── Potta_One
│   │               │   ├── OFL.txt
│   │               │   └── PottaOne-Regular.ttf
│   │               └── Shippori_Mincho
│   │                   ├── OFL.txt
│   │                   └── ShipporiMincho-Regular.ttf
│   ├── templates
│   │   └── ...
│   ├── tests.py
│   ├── urls.py
│   └── views.py
├── db.sqlite3
├── findthedifferentkanji
│   └── ...
└── manage.py
views.pyの修正
次にviews.pyを修正していきます。
プログラムのベース自体は前に作成した時と同じですので、良かったらこちらの記事も参考にしてください。
ただ少し違うのは、今回play.htmlで使ったプログラムをさらにmake.htmlでも使うため、関数化しています。
まず一つ目は問題の漢字を「question.json」より抽出し、縦横の個数を決め、そこから問題の基となるリストを作成する関数「output_char_list」。
def output_char_list(question_json, cell_min=10, cell_max=20):
    with open(question_json, 'r') as f_in:
        question_list = json.load(f_in)

    char_list = question_list[random.choice(list(question_list))]

    vertical = random.randint(cell_min, cell_max)
    horizontal = random.randint(cell_min, cell_max)
    num_char = vertical*horizontal
    diff_char_no = random.randint(1, num_char)

    output_list = []

    for num in range(1, num_char+1):
        if num == diff_char_no:
            output_list.append(char_list[1])
        else:
            output_list.append(char_list[0])

    return vertical, horizontal, diff_char_no, output_list, char_list
二つ目は使用するフォントを抽出する関数「font_pick」。
def font_pick(fonts_json):
with open(fonts_json, 'r') as f_in:
fonts_list = json.load(f_in)
font_name = random.choice(list(fonts_list))
font_path = fonts_list[font_name]
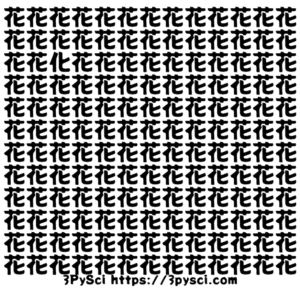
return font_name, font_path三つ目はmatplotlibを使って問題の画像を作成する関数「question_fig」です。
def question_fig(font_path, vertical, horizontal, output_list, fig_path):

    fp = fm.FontProperties(fname=font_path)

    fig = plt.figure(figsize=(horizontal, vertical))
    plt.clf()

    i = 0
    for x in range(1, horizontal+1):
        for y in range(1, vertical+1):
            plt.text((x-1)/horizontal, (y-1)/vertical, output_list[i], fontsize=55, fontproperties=fp)
            i = i + 1

    plt.gca().spines['right'].set_visible(False)
    plt.gca().spines['top'].set_visible(False)
    plt.gca().spines['bottom'].set_visible(False)
    plt.gca().spines['left'].set_visible(False)
    plt.tick_params(labelbottom=False, labelleft=False, labelright=False, labeltop=False, bottom=False, left=False, right=False, top=False)

    plt.xlabel('漢字間違い探し https://findthedifferentkanji.com', fontsize=20, fontproperties=fp)

    plt.savefig(f'{fig_path}', facecolor="white", bbox_inches='tight', pad_inches = 0.1)
実際は最初の二つの関数はmake.htmlでは使用しませんが、メインのプログラム中に入れてしまうと結構乱雑になってしまうので、とりあえず関数化しました。
そしてページにアクセスがあった場合に、表示する部分のプログラムはこちら。
from django.shortcuts import render
from django.http import HttpResponse
import json
import random
import matplotlib
matplotlib.use('Agg')
from matplotlib import pyplot as plt
import matplotlib.font_manager as fm

question_json = 'contents/settings/question.json'
fonts_json = 'contents/settings/fonts.json'
fig_path = 'contents/static/contents/assets/img/question.png'

def index(request):

    return render(request, 'contents/index.html')

def play(request):

    vertical, horizontal, diff_char_num, output_list, char_list = output_char_list(question_json)
    font_name, font_path = font_pick(fonts_json)

    question_fig(font_path, vertical, horizontal, output_list, fig_path)

    return render(request, 'contents/play.html')

def make(request):

    return render(request, 'contents/make.html')

def about(request):

    return render(request, 'contents/about.html')
先ほどの独自関数はこの下に追加しておきましょう。
新たにインポートしているのはこちらの5つ。
import json
import random
import matplotlib
matplotlib.use('Agg')
from matplotlib import pyplot as plt
import matplotlib.font_manager as fm
こちらの記事でも触れていますが、「matplotlib.use(‘Agg’)」はバックグラウンドでmatplotlibを実行するためのコマンドです。

そして設定ファイルと画像ファイルの場所の指定をします。
question_json = 'contents/settings/question.json'
fonts_json = 'contents/settings/fonts.json'
fig_path = 'contents/static/contents/assets/img/question.png'
ちなみに今回はアクセスされるたびに「question.png」を上書きすることで、新しい問題を表示するプログラムにしました。
あとはplay.htmlにアクセスがあった場合に実行される「play関数」に先ほどの関数で問題を作成するようにプログラミングします。
def play(request):

    vertical, horizontal, diff_char_num, output_list, char_list = output_char_list(question_json)
    font_name, font_path = font_pick(fonts_json)
    question_fig(font_path, vertical, horizontal, output_list, fig_path)

    return render(request, 'contents/play.html')
これでアクセスされるたび新しい問題が表示されるプログラムができました。
play.htmlのボタンのリンク
あとは「新しい問題へ」のボタンのリンクの修正です。
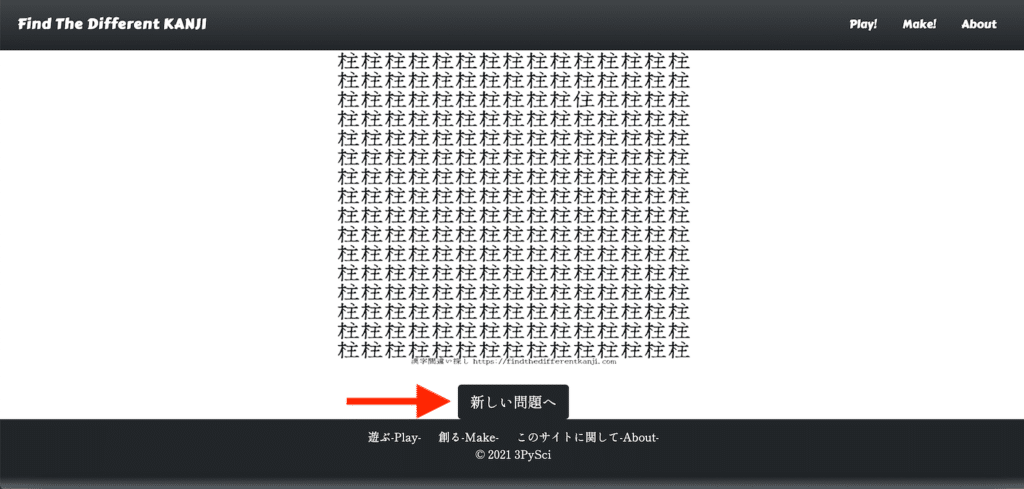
先ほどプログラミングしたようにこのページにアクセスされるたび新しい問題が作成・表示されますので、ここは単純に「play.html」にリンクするだけで大丈夫です。
そのためplay.htmlの修正点はこの部分です。
<button class="btn btn-dark btn-lg" type="button" style="font-family: 'Shippori Mincho', serif;">新しい問題へ</button>このButtonタグの中に「onclick=”location.href=’URL'”」を追加します。
<button class="btn btn-dark btn-lg" type="button" onclick="location.href='play.html'" style="font-family: 'Shippori Mincho', serif;">新しい問題へ</button>これで「新しい問題へ」のボタンをクリックすると、play.htmlを再度開き、新しい問題が表示されるようになります。
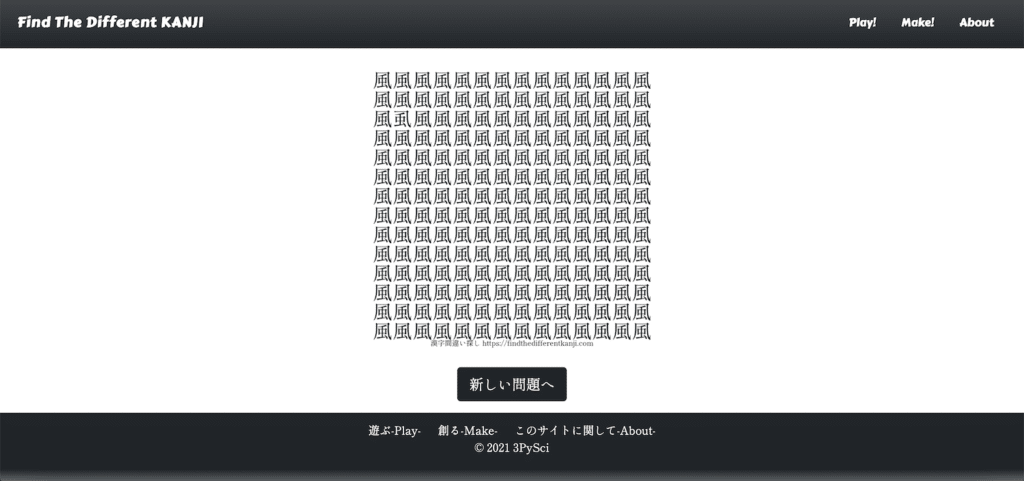
画像の最大サイズの調整
何度も問題を表示させていると気になるのが、画像が大きすぎて、スクロールしないと全体が見えない場合があることです。
またその場合は「新しい問題へ」のボタンも下のバーに隠れてしまいます。
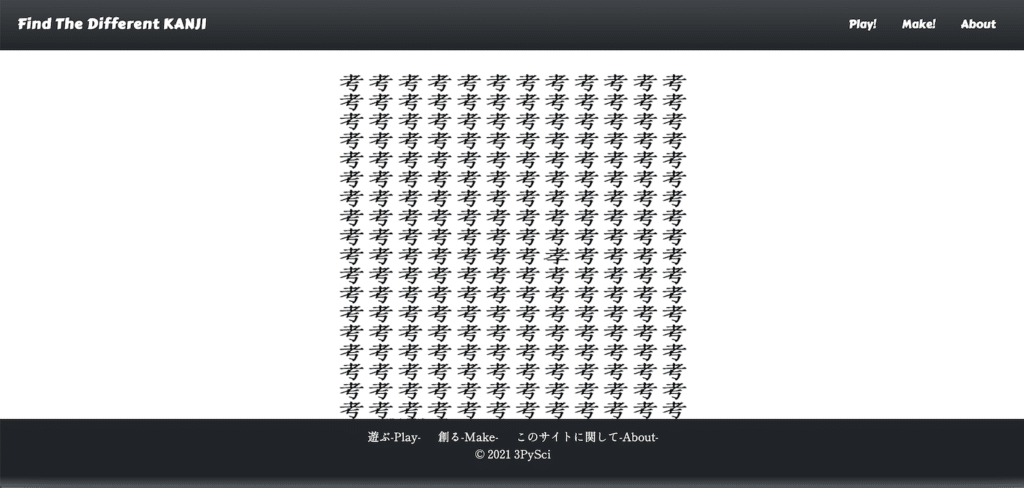
これではせっかくのクイズも台無しなので、最大サイズを調整しておきましょう。
変更するのはplay.htmlのこの部分。
<img src="{% static 'contents/assets/img/question.png' %}" width="100%" height="100%" style="max-width: 500px;max-height: 500px;">max-widthとmax-heightがそれぞれ500 pxになっています。
色々試した結果、私の環境では400 pxが良さそうだったので、とりあえずは400 pxに変更しておきましょう。
<img src="{% static 'contents/assets/img/question.png' %}" width="100%" height="100%" style="max-width: 400px;max-height: 400px;">ちなみに縦横のピクセル数を違う数値にすることも可能ですが、試してみた結果、どうもアスペクト比が変わってしまい、画像が歪むことがあったので、同じ値にしておいた方が無難なようです。
これで何度も表示しても画像やボタンが見えなくなることがなくなりました。
というわけでplay.htmlはこれにて完成です。
次回はmake.htmlのプログラミングをしていきましょう。

ではでは今回はこんな感じで。
コメント