Django
前回、ワードクラウドアプリで出力用フォントのラジオボタンを設置し、ワードクラウドアプリは完成しました。

ということで今回から新しいアプリの作成に移りましょう。
今回から作成していくのは、「足し算テスト」アプリです。
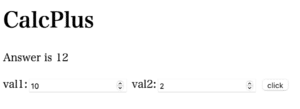
前に足し算アプリを作成しましたが、前のアプリは二つの数を入力すると足し算の答えを表示してくれるというものでした。
今回から作成するのは「テスト」アプリなので、二つの数が表示されていて、その答えを入力し、正解か不正解かをチェックするアプリです。
ということで始めていきましょう。
新規アプリの作成
まずは新しいアプリ「tashizan1」を作成していきます。
最後に「1」をつけたのは多分複数の足し算アプリを作るだろうとのことからで、大きな意味はありません。
新規アプリの作成手順は、こちらの記事と同様に作成していきます。
大まかな流れとしてはこんな感じです。
- 新しいアプリ「tashizan1」を作成
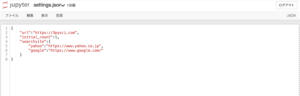
- /webapp/webapp/settings.pyのINSTALLED APPに「tashizan1」を追加
- /webapp/webapp/urls.pyに「tashizan1」を追加
- /webapp/webapp/params.jsonに「足し算テスト」を追加
- /webapp/index/urls.py、views.pyを/webapp/tashizan1 にコピー
- /webapp/wordcloudapp/templates/tashizan1 フォルダを作成
- /webapp/index/templates/index から/webapp/tashizan1/templates/tashizan1 にindex.htmlをコピー
なお今回は画像を使う予定はないので、staticフォルダは作成していません。
足し算テストアプリは2ページ構成
足し算テストアプリを作っていくにあたって、これまでとは違った作り方をしていきます。
これまでは一つのアプリに対して、一つのページで、条件を入力してクリックすると、その条件による実行結果(グラフを描いたり、ワードクラウド画像を作成したり)が「同じページ」に表示されました。
しかし今回のアプリは「答えを入力するページ」と「答え合わせの結果を表示するページ」の2つのページを使うアプリにしていきましょう。
ということで今回は2ページのアプリを作成する方法を試していきましょう。
2つのページを移動する方法
今回、いじっていくファイルは以下の4つです。
- /webapp/tashizan1/views.py
- /webapp/tashizan1/urls.py
- /webapp/tashizan1/templates/tashizan1/index.html
- /webapp/tashizan1/templates/tashizan1/answercheck.html (後でindex.htmlをコピー)
webapp
├── ...
└── tashizan1
    ├── __init__.py
    ├── admin.py
    ├── apps.py
    ├── forms.py
    ├── migrations
    │   └── __init__.py
    ├── models.py
    ├── templates
    │   └── tashizan1
    │       ├── answercheck.html          <- 後でindex.htmlをコピー
    │       └── index.html                <- これ
    ├── tests.py
    ├── urls.py                           <- これ
    └── views.py                          <- これ
ちなみに「ansercheck.html」に関しては、index.htmlを作成したところからコピーしていきますので、まだ作成しなくて大丈夫です。
/webapp/tashizan1/views.py
まずはviews.pyを修正していきます。
といっても単純に二つのページを表示するというだけなので、かなり単純な内容になっています。
from django.shortcuts import render
from django.http import HttpResponse
import sys
sys.path.append('../')
from webapp import definitions

def index(request):
    params = definitions.readjson()

    return render(request, 'tashizan1/index.html', params)

def answercheck(request):
    params = definitions.readjson()

    return render(request, 'tashizan1/answercheck.html', params)
こちらの部分で「index」が呼び出された場合は、「index.html」を表示します。
def index(request):
    params = definitions.readjson()

    return render(request, 'tashizan1/index.html', params)
「params = definitions.readjson()」はこのサイト(3PySci-App)独自の設定ファイルなので、通常はなくて大丈夫です。
また「answercheck」が呼び出された場合は、「answercheck.html」を表示するという部分はこちらです。
def answercheck(request):
    params = definitions.readjson()

    return render(request, 'tashizan1/answercheck.html', params)
/webapp/tashizan1/urls.py
今回は2ページ使っていくので、「urls.py」の修正も必要です。
ということでこんな感じです。
from django.urls import path
from . import views

urlpatterns = [
    path('', views.index, name='index'),
    path('answercheck', views.answercheck, name='answercheck')
]
まずこれまで通り、このアプリにアクセスがあった場合、「views.pyのindex」を実行するようにしています。
path('', views.index, name='index'),ただしこちらの部分で、「answercheck」(URLとしてはhttps://3pysci-app.com/tashizan1/answercheck)にアクセスがあった場合は、「views.pyのanswercheck」を実行するとしています。
path('answercheck', views.answercheck, name='answercheck')ちなみにHTML上で使用する名前は最後の「name=”」の部分なので、それぞれ「index」と「answercheck」となります。
/webapp/tashizan1/templates/tashizan1/index.html
次に「index.html」を修正していきます。
今回はボタンを押したら「answercheck.html」に移動する(将来的には入力値等の情報込みで)だけなので、かなり単純な作りになっています。
{% extends "basetemplates/base.html" %}

{% block title %}
<title>{{ title }}|足し算テスト1</title>
{% endblock %}

{% block content %}
<h1>足し算テスト1</h1>
<form action="{% url 'answercheck' %}" method="post">
    {% csrf_token %}
    <input type='submit' value="答え合わせ">
</form>
{% endblock %}
重要なのはこの部分。
<form action="{% url 'answercheck' %}" method="post">例えば一次関数グラフ表示アプリでは、こうなっていました。
<form action="/linearfunction/" method="post">「action」の指定先が異なっており、一次関数グラフ表示アプリでは「/linearfunction/」、つまり「urls.py」を見てみると、「views.py内のindex」を指定しています。
from django.urls import path
from . import views

urlpatterns = [
    path('', views.index, name='index')
]
さらに「views.pyのindex」を見てみると、「linearfunction/index.html」を指定していることから、「index.html」が表示されるということです。
from django.shortcuts import render
from django.http import HttpResponse
from .forms import LFForm
import matplotlib
matplotlib.use('Agg')
from matplotlib import pyplot as plt
import sys
sys.path.append('../')
from webapp import definitions

(中略)

def index(request):
    params = definitions.readjson()

    (中略)

    return render(request, 'linearfunction/index.html', params)
今回の足し算テストアプリでは、「answercheck」を指定していることから、「urls.pyのanswercheck」、すなわち「views.pyのanswercheck」を実行。
from django.urls import path
from . import views

urlpatterns = [
    path('', views.index, name='index'),
    path('answercheck', views.answercheck, name='answercheck')
]
from django.shortcuts import render
from django.http import HttpResponse
import sys
sys.path.append('../')
from webapp import definitions
(中略)
def answercheck(request):
params = definitions.readjson()
return render(request, 'tashizan1/answercheck.html', params)そのため、「answercheck.html」が表示されます。
これでフォームのボタンをクリックすると「answercheck.html」に移動できます。
/webapp/tashizan1/templates/tashizan1/answercheck.html
次に「answercheck.html」に「index.html」に戻るボタンを作成します。
ほとんどん同じHTMLなので、先ほど作成したindex.htmlを「answercheck.html」としてコピーします。
そしてformタグ内の指定先を「index」に変更します。
<form action="{% url 'index' %}" method="post">ということで全体としてはこんな感じです。
{% extends "basetemplates/base.html" %}

{% block title %}
<title>{{ title }}|足し算テスト1</title>
{% endblock %}

{% block content %}
<h1>足し算テスト1</h1>
<form action="{% url 'index' %}" method="post">
    {% csrf_token %}
    <input type='submit' value="もう一回!">
</form>
{% endblock %}
ついでにinputタグの「value」を変更して、ボタン上の表示を変えておきました。
<input type='submit' value="もう一回!">これでサーバーを起動し、試してみましょう。
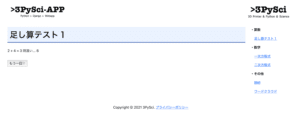
まずアクセスした状態ではこんな感じです。
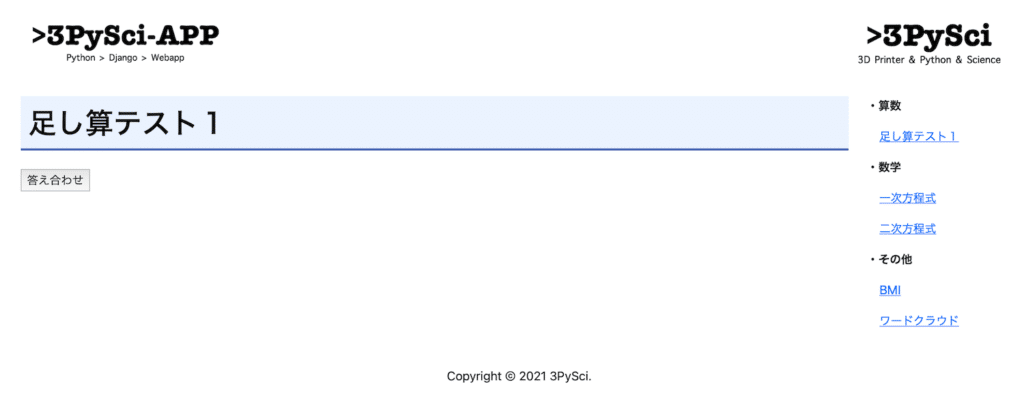
「答え合わせ」というボタンが左上に表示されました。
またサイトのURLを確認してみると「http://127.0.0.1:8000/tashizan1/」です。
(このアプリを作成している時期にこのウェブサイトの公開を始めようとしていたのでロゴが変わっていますが、気にしないでください。)
「答え合わせ」ボタンをクリックしてみましょう。

ボタンが「もう一回!」に変わりました。
この時のURLは「http://127.0.0.1:8000/tashizan1/answercheck」でちゃんとページが変わっていることが確認できます。
さらに「もう一回!」のボタンをクリックしてみると、最初のページに戻ります。
これで2ページを移動するアプリができました。
次回はこの2ページ間で値を受け渡しする方法を試していきましょう。
ではでは今回はこんな感じで。
コメント